Create and Configure Shift Calendars
Before production shifts can be assigned to operators or lines, the system needs to know when and how long each work period lasts.
This is managed through two layers of configuration:
Shift Types – reusable time templates defining start time, duration, and breaks.
Calendars – actual planning timelines that use Shift Types as events distributed over time.
The combination of these two layers allows you to create standardized working schedules and apply them across multiple production lines.
1. Create Shift Types
What are Shift Types
Shift Types represent predefined working patterns — for example, a Morning Shift running from 06:00 to 14:00 or a Night Shift from 22:00 to 06:00.
These definitions are later used when populating calendars to ensure consistency and reduce manual input.
How to Create a Shift Type
Open Parametrization → Calendars → Shift Types.
Click Add new in the top-right corner.
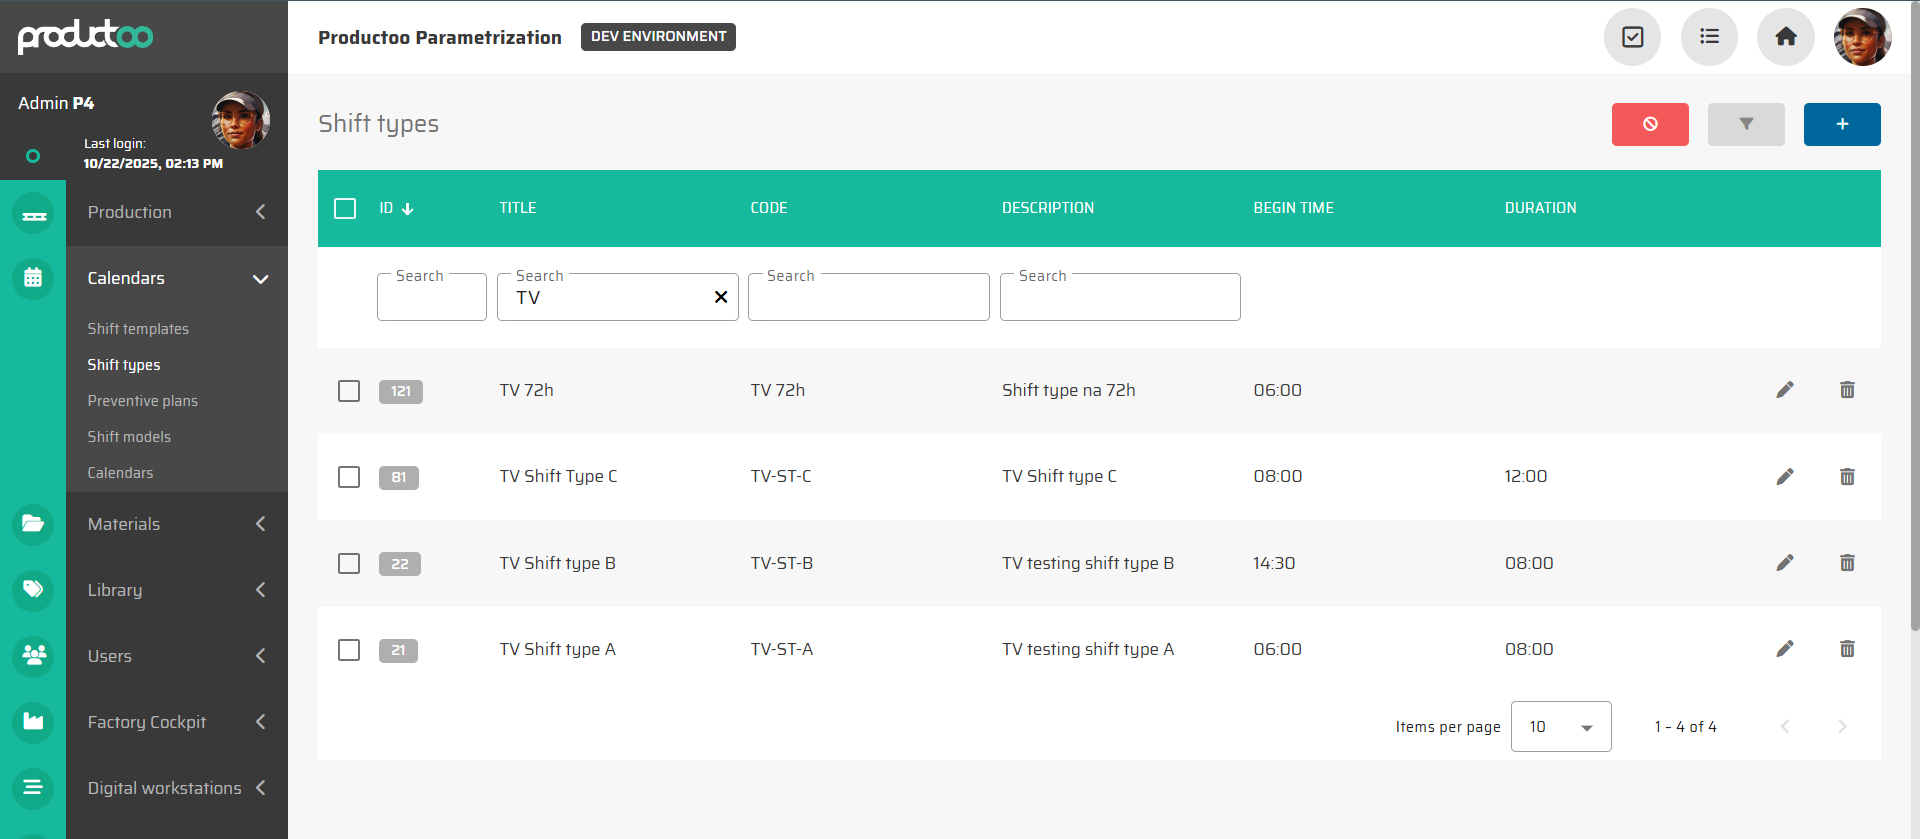
Fill in the main fields:
Title: Descriptive name (e.g., Morning Shift).
Code: Short code or abbreviation (e.g., A-06-14).
Description: Optional explanation (e.g., Standard day shift for Line A).
Begin Time: Start of the shift in
HH:MM:SSformat.Duration: Shift duration (e.g.,
08:00:00for eight hours).
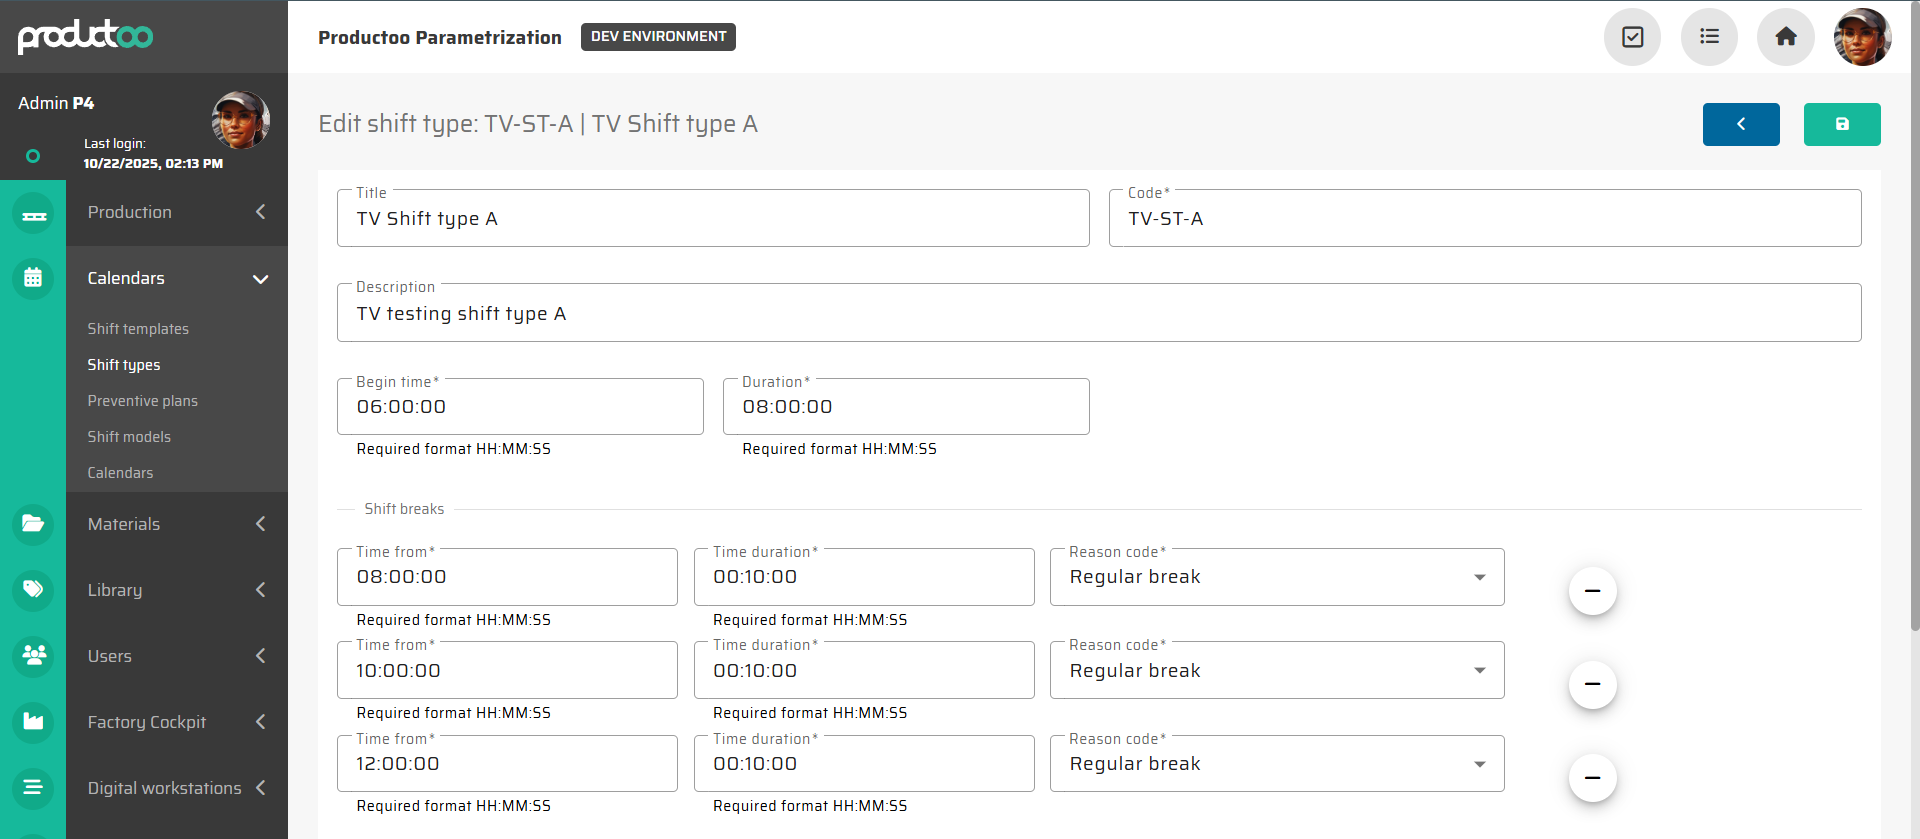
Optionally, define Shift Breaks:
Specify
Time from,Duration.Multiple breaks can be added per shift and
Reason code(e.g., Regular break, Lunch break).
Click Save to confirm.
Tip: Define all typical shift patterns in advance (e.g., Morning, Afternoon shifts). They can later be reused across all production calendars.
2. Create a Calendar
Once the Shift Types are prepared, you can create a Calendar that will hold the actual schedule of shift occurrences.
Navigate to Parametrization → Calendars → Calendars.
Click Add new.
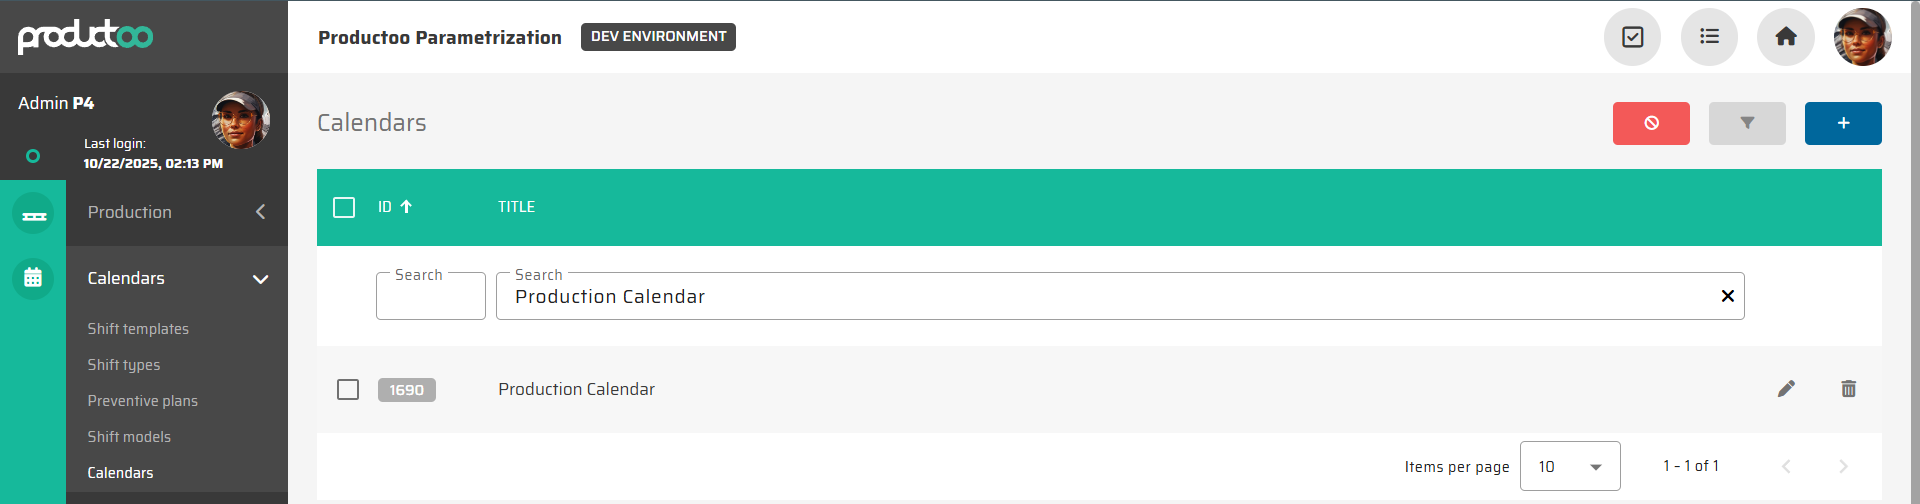
Fill in the following details:
Title: Calendar name (e.g., Production Calendar).
Planned time range (weeks): Defines how many weeks ahead the system will pre-generate events.
Default:
52(1 year ahead).For lighter system load, reduce to e.g.,
10weeks — the system will automatically extend the range over time.
Optionally add a Description for internal reference.
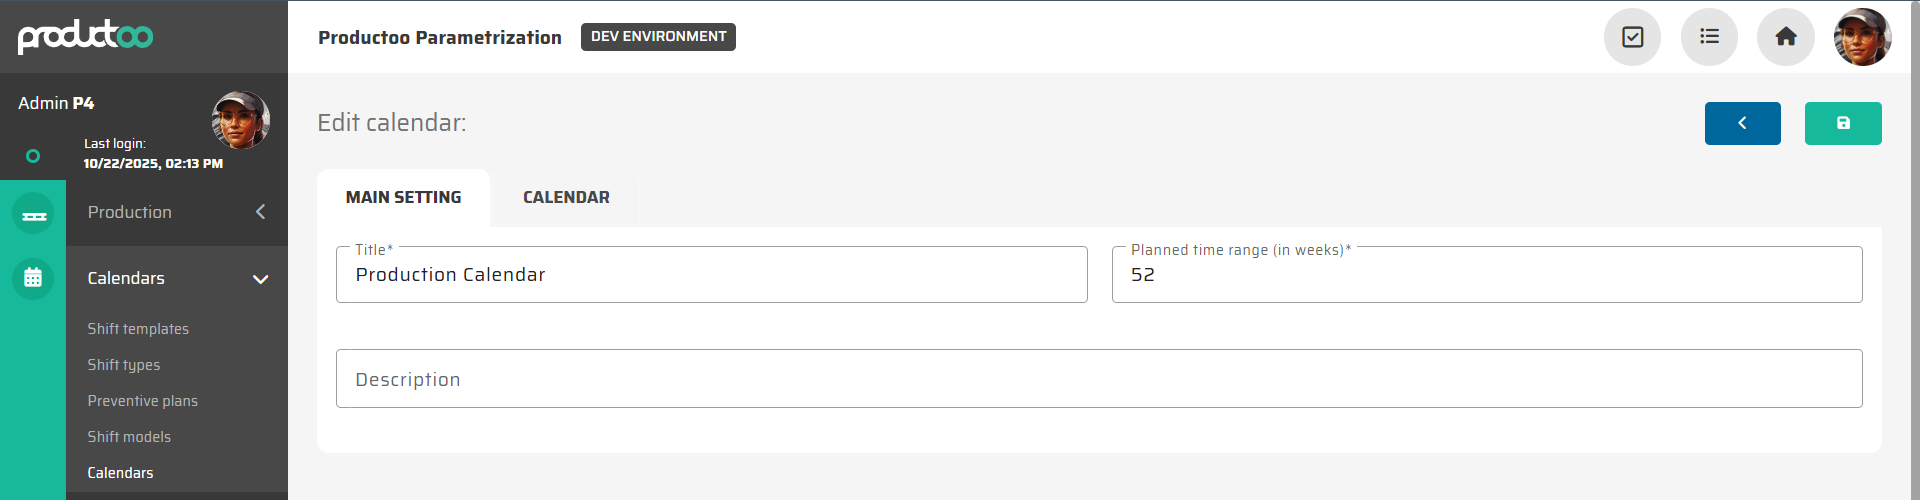
Click Save to create an empty calendar.
Performance note:
A shorter planning range (e.g., 10 weeks) means faster calendar loading and smaller data volume, which can help optimize system performance in large-scale environments.
3. Add Events to the Calendar
With a calendar created, you can now populate it with shift events based on your predefined Shift Types.
Open your calendar and switch to the Calendar tab.
Use the Add New Event button or click directly on the timeline.
In the event dialog, fill in:
Shift Type: Choose from your predefined templates.
Name: Automatically filled after selecting a Shift Type (editable if needed).
Valid From / Valid To: Defines the time period for which this shift pattern applies.
Begin Time and Duration: Pre-filled from the selected Shift Type (modifiable).
Repetition Period:
None – one-time shift
Daily – repeats every day
Weekly – repeats once per week
Biweekly – repeats every two weeks
Staff: Number of planned operators per shift (default: 1).
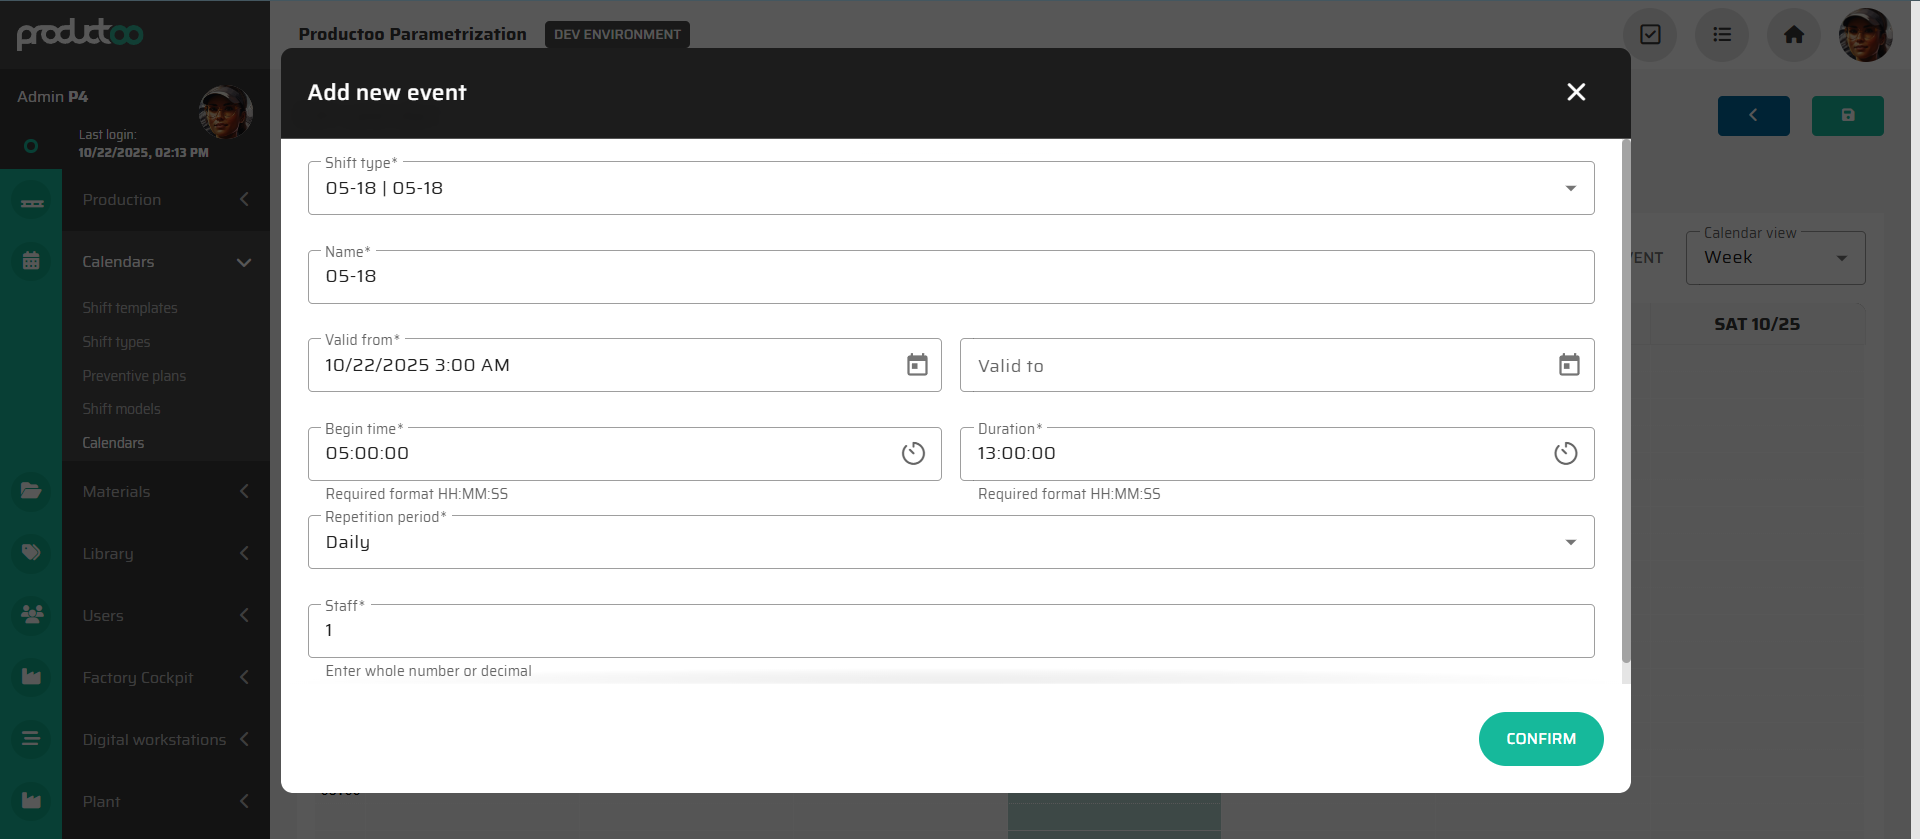
Click Confirm to add the event.
The event now appears in the calendar visualization for the selected day.
Tip: Use Daily repetition to quickly populate recurring shifts for several weeks. You can always edit or delete individual days later.
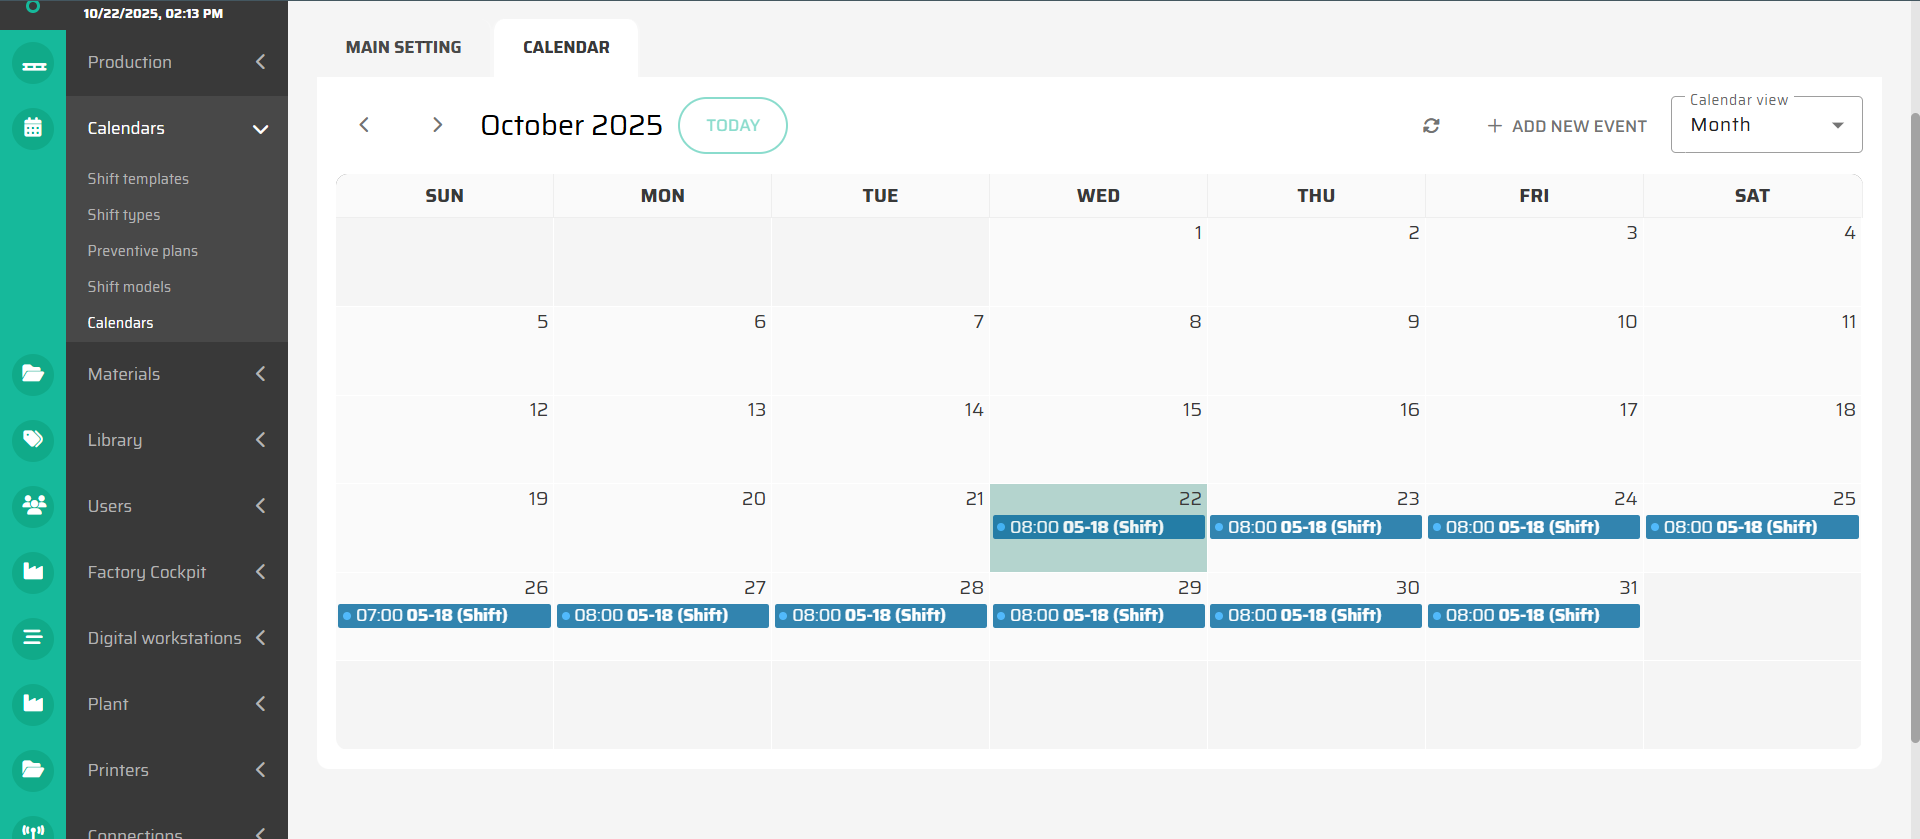
4. Review and Adjust the Calendar
Once events are created, the system visualizes them as a timeline or monthly overview:
Use Week view for detailed daily shifts (Screenshot 6).
Use Month view for a broader overview (Screenshot 7).
Each shift block displays start and end time, shift code, and repetition pattern.
You can:
Click an event to edit its timing or repetition.
Drag-and-drop to move a shift to another day.
Delete obsolete events.
6. Validation
Once your calendars are configured:
Verify that all expected Shift Types appear within the selected range.
Ensure there are no overlapping or missing shifts.
Cross-check that the staff count reflects the expected operator coverage.
If the data appears correct, the calendar setup is complete.
Summary
Shift Types define reusable time patterns.
Calendars represent real timelines combining those patterns.
Events link both together, creating the working schedule.
With this setup complete, your Time and Attendance module now has the temporal foundation for all attendance, operator assignments, and reporting.
5. Apply the Calendar to Production Lines
After the calendar is finalized, it can be assigned to one or multiple production lines.
This ensures all operators scheduled for those lines follow the same working rhythm.
The assignment process is described in the next section: Assign Calendars to Production Lines