Assign Calendars to Production Lines
This step connects the working time structure (calendar) with the physical production assets (lines) — ensuring that operators, team leaders, and planning tools all use the same time framework.
Each production line can have:
Its own calendar, or
A shared calendar reused across multiple lines with identical working schedules.
This approach allows you to maintain one unified time definition while still allowing local overrides when needed.
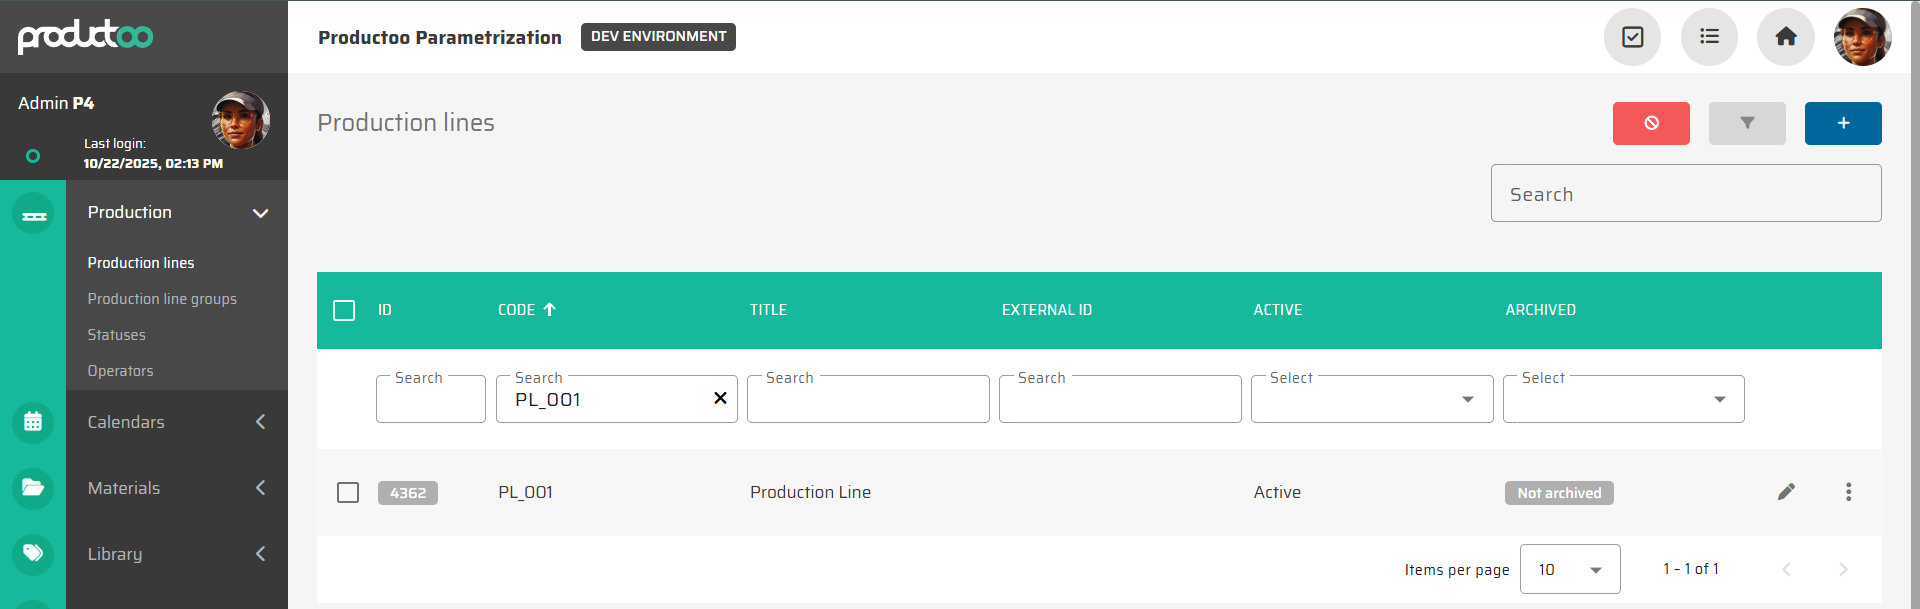
1. Access the Production Lines Overview
Go to Parametrization → Production → Production Lines.
The overview displays all existing production lines.
If lines were imported earlier through CSV, they already appear here.
If no lines exist yet, you can create them manually.
2. Create or Edit a Production Line
To create a new line:
Click the Create new production line button in the top-right corner.
Fill in at least the three mandatory fields:
Code – unique identifier for the line (e.g.,
PL_001).Title – readable name (e.g., Production Line 1).
Calendar assignment – defined later in the Planning tab.
To edit an existing line:
Click the Edit icon on the right side of the desired line entry.

3. Open the Planning Tab
In the production line detail, navigate to the Planning tab.
This tab defines how shifts and operating periods are generated for the line.
In the upper part of the screen, you can configure parameters such as:
Utilization Factor
Frozen Period Items / Time
Default Material Changeover Time
These parameters affect production scheduling but are optional for basic calendar linkage. To get to know more about individual parametrs of production line you can look into detailed documentation for Production Line.
4. Choose the Shift Generation Source
Within the Planning tab, you’ll find three available configuration models for defining shifts:
Shift Model – generated according to static templates (legacy mode).
Shift Templates – predefined event sequences for repeating cycles.
Calendar – uses the graphical calendar created earlier.
Select Calendar as the preferred source.
Once selected, a dropdown list appears with all available calendars.
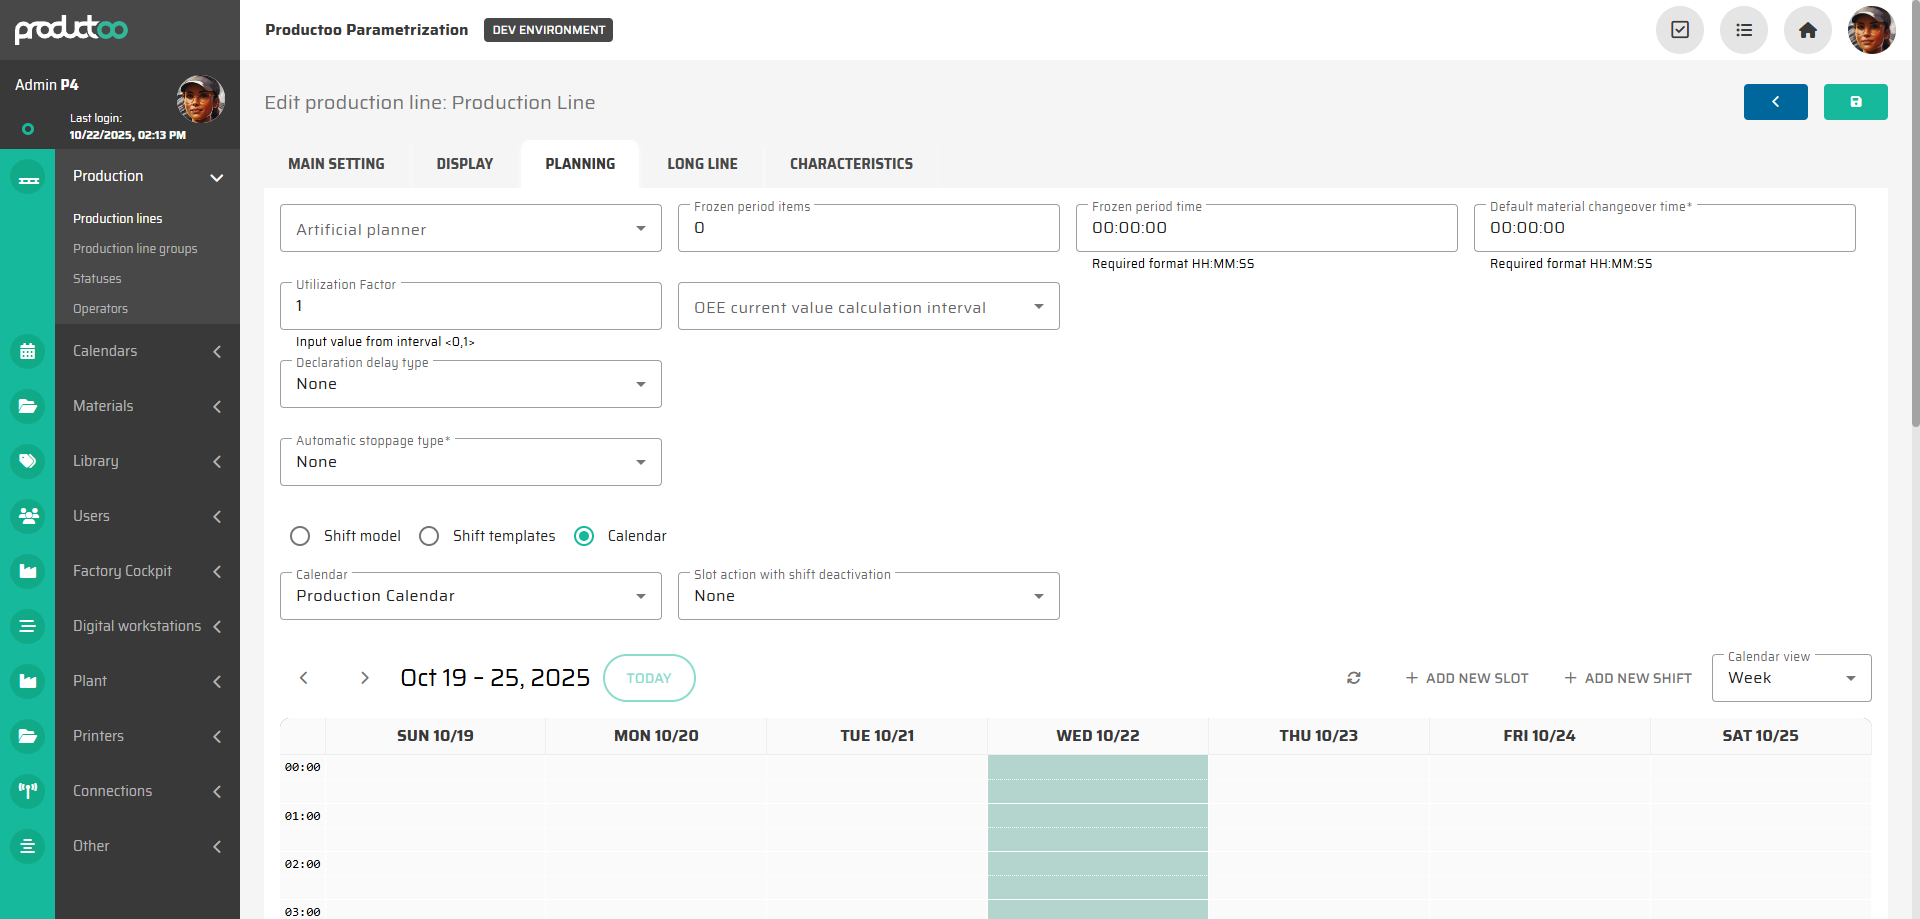
5. Assign the Calendar
From the Calendar dropdown, select your previously created one (e.g., Production Calendar).
Once selected, the lower section displays a visual timeline of the assigned calendar for immediate verification.
You can switch between Day/Week/Month and Year views.
Use Add New Shift to add line-specific modifications if needed.
Important note:
Changes made here (e.g., added or removed shifts) affect only this production line — not the original shared calendar.
This allows localized adjustments (e.g., maintenance windows or specific line schedules).
6. Save and Validate
After assigning the calendar, click Save to confirm the configuration.
Return to the Production Lines Overview to verify that your new or updated line is listed as Active.
Optionally, open the Production Control module and check that the line’s planned shifts now appear in the Team Leader and Operator views.
7. Common Use Cases
Shared Calendar: Several lines use the same schedule (simplifies maintenance).
Custom Calendar per Line: Unique schedules (e.g., alternating day/night lines).
Hybrid Setup: Shared base calendar + individual line overrides for special cases.
This flexibility enables centralized time control while preserving per-line customization.
Next Step
Proceed to the next configuration stage: Create and Configure Operators – define operator profiles, login credentials, and skill matrix, or continue to Using Attendance Module in Production Control.