Create and Configure Operators
Operators represent individual workers on the shop floor. Each operator can be assigned to one or more production lines, teams, or cost centers and can log in to declaration terminals using a PIN or RFID card.
Operators are central to the Time and Attendance module — their profiles define who is working, where, and when.
Operators can be created in two ways:
Automatically – by importing from CSV (see the Import Attendance Data section)
Manually – directly in the Parametrization → Production → Operators section
1. Access the Operators Overview
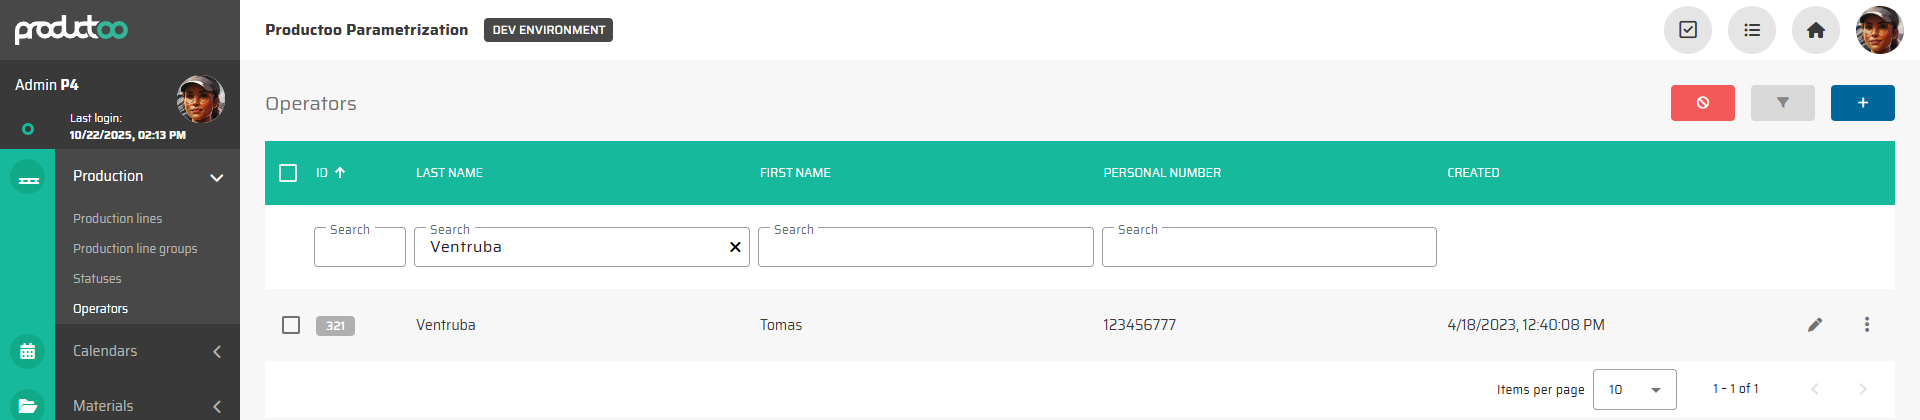
Open Parametrization → Production → Operators.
The overview lists all existing operators.
Each record displays the operator’s Last name, First name, Personal number, and Created date.
You can use the search filters above each column to quickly locate a specific operator.
2. Create or Edit an Operator
To create a new operator:
Click Create new operator in the top-right corner.
The system opens a new form with three tabs:
Main Setting
Qualifications
Media
To edit an existing operator, click the Edit icon next to their record.
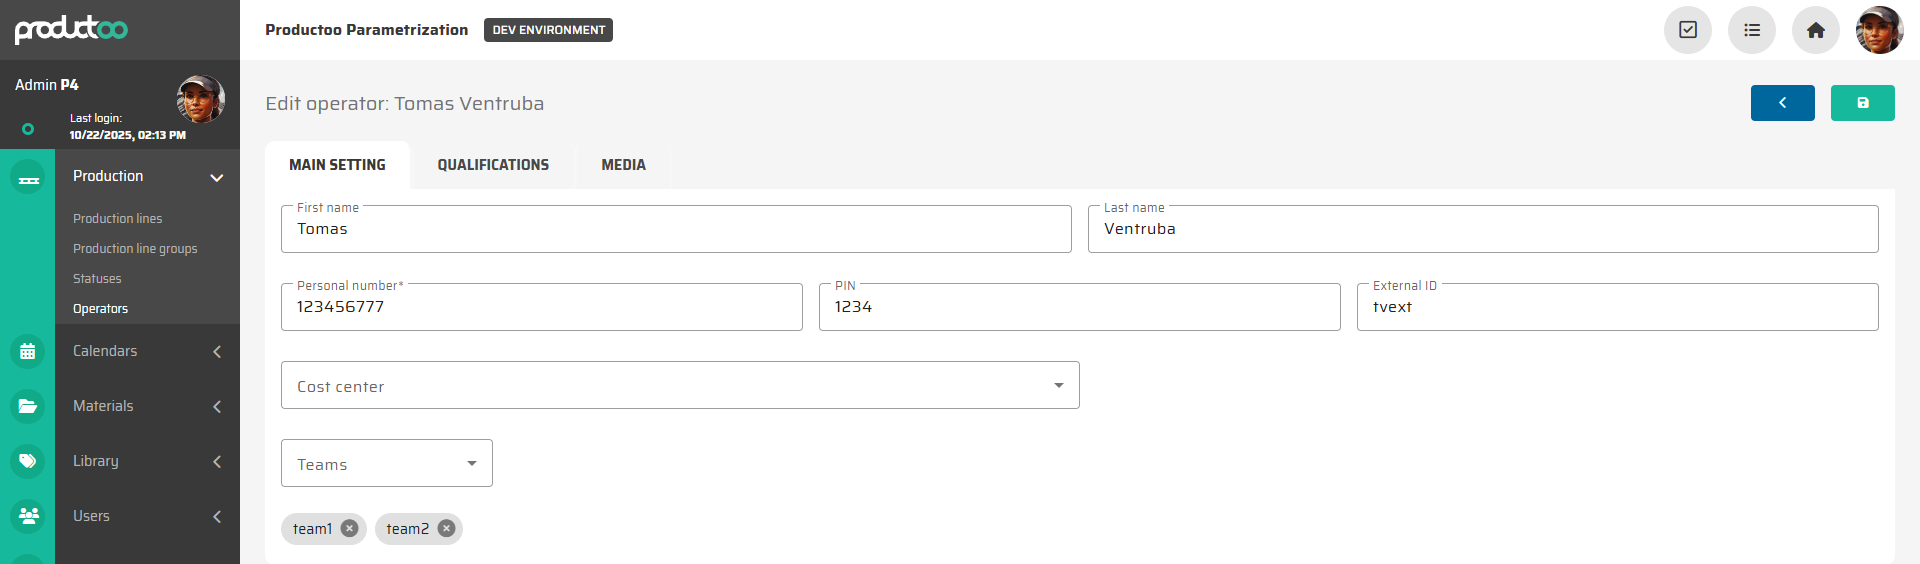
3. Fill in Operator Main Settings
In the Main Setting tab, fill in the following fields:
Field | Description |
|---|---|
First name / Last name | Operator’s full name displayed in all production and attendance views. |
Personal Number | Unique numerical identifier (e.g., employee ID). This must be unique for each operator. |
PIN | Numeric login code used by the operator to log into declaration terminals. |
External ID | Optional identifier used for RFID or chip card authentication. This allows operators to log in using their RFID badge instead of typing a PIN. |
Cost Center | Assigns the operator to a specific cost center or department. |
Teams | Defines one or more teams that the operator belongs to (e.g., Team A, Team B). |
Tip:
The PIN is typically used for shared workstations or touch terminals.
The External ID should match the RFID card value if RFID login is enabled.
After filling in the details, click Save.
4. Define Operator Qualifications
Once the main data is saved, switch to the Qualifications tab to define where the operator can work and with what efficiency.
Each operator can be qualified for multiple production lines. For each qualification, specify:
Production Line – select one or more lines the operator is trained to operate.
Skill Percentage – defines the operator’s efficiency level on that line (
0–100%).
Example | Explanation |
|---|---|
| Fully trained and operating at standard cycle time. |
| Slightly slower due to training or line complexity. |
| Faster than standard (used in exceptional cases). |
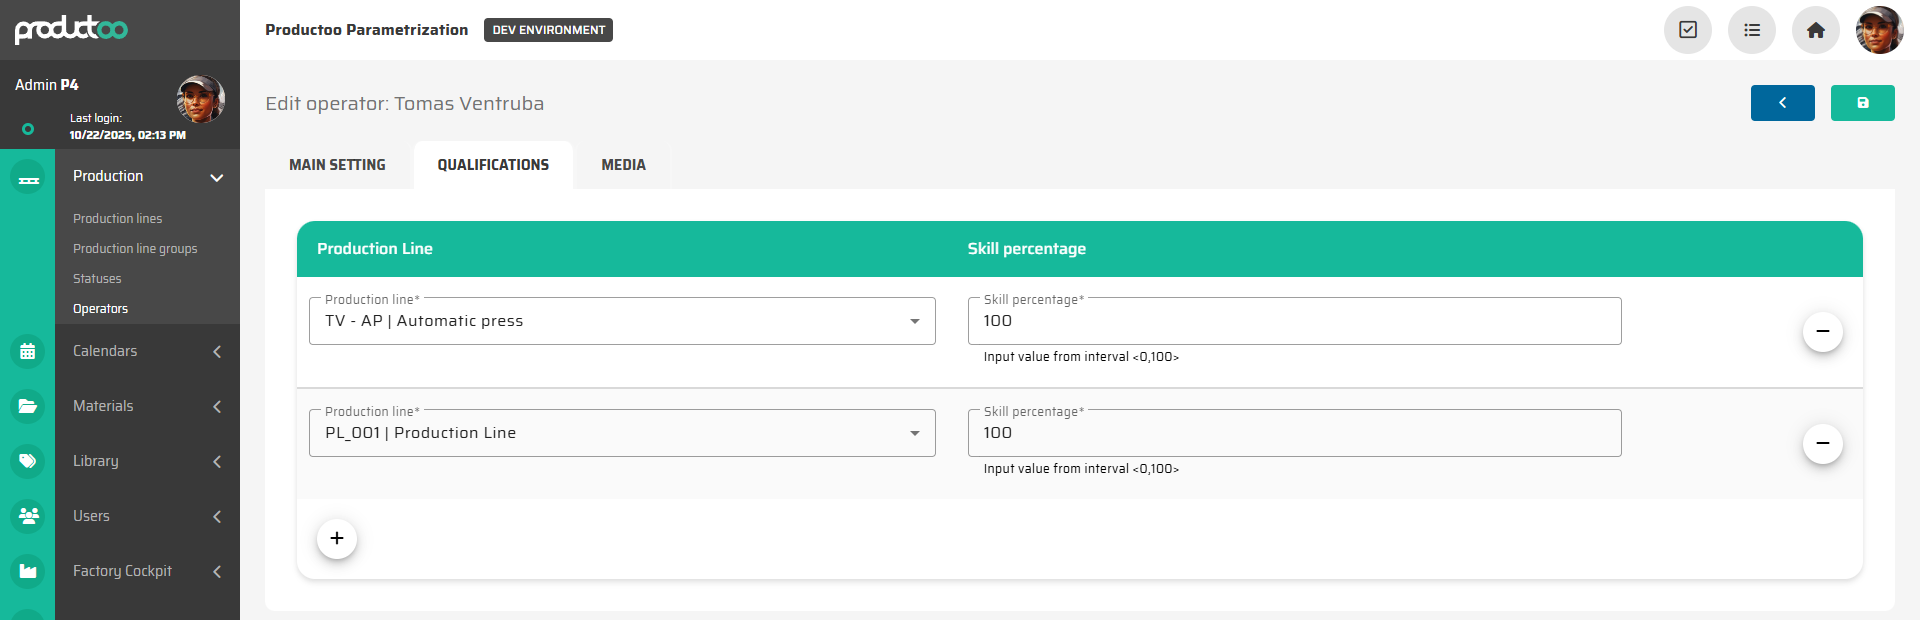
System Behavior:
Skill percentage can influence planning algorithms and KPIs — for example, it can affect estimated production throughput when operators are assigned to shifts.
5. Add Operator Media (Optional)
In the Media tab, you can attach a photo of the operator or upload supporting documents (e.g., certifications, ID scans).
This step is optional but helps users visually identify workers on terminals.
Next Step
With operators and their skill matrix defined, you can now proceed to operational usage in the Production Control environment: Using the Attendance Module in Production Control