Creating the Interactive UI (Widgets)
We have our data and our business logic ready. Now, we need an interface so users can actually interact with the Kanban Board.
In the P4 Platform, the interactive behavioral layer is called a Widget. A Widget is the bridge between what the user sees (the visual layout) and what the system does (the backend flows). It defines actions, reactions, and interactive behavior.
Let's build the interactive part of our Kanban Board!
Step 1: Initialize the Widget
Navigate to Configuration Studio ➔ Process Builder ➔ Widgets and click to create a new one. Name it Kanban Board.
Start Node: Unlike our backend flows, we don't have any specific variables that must be defined during the initial page load for this widget. Leave the Start node empty and connect it to a View node.
Step 2: The View Node (Your Canvas)
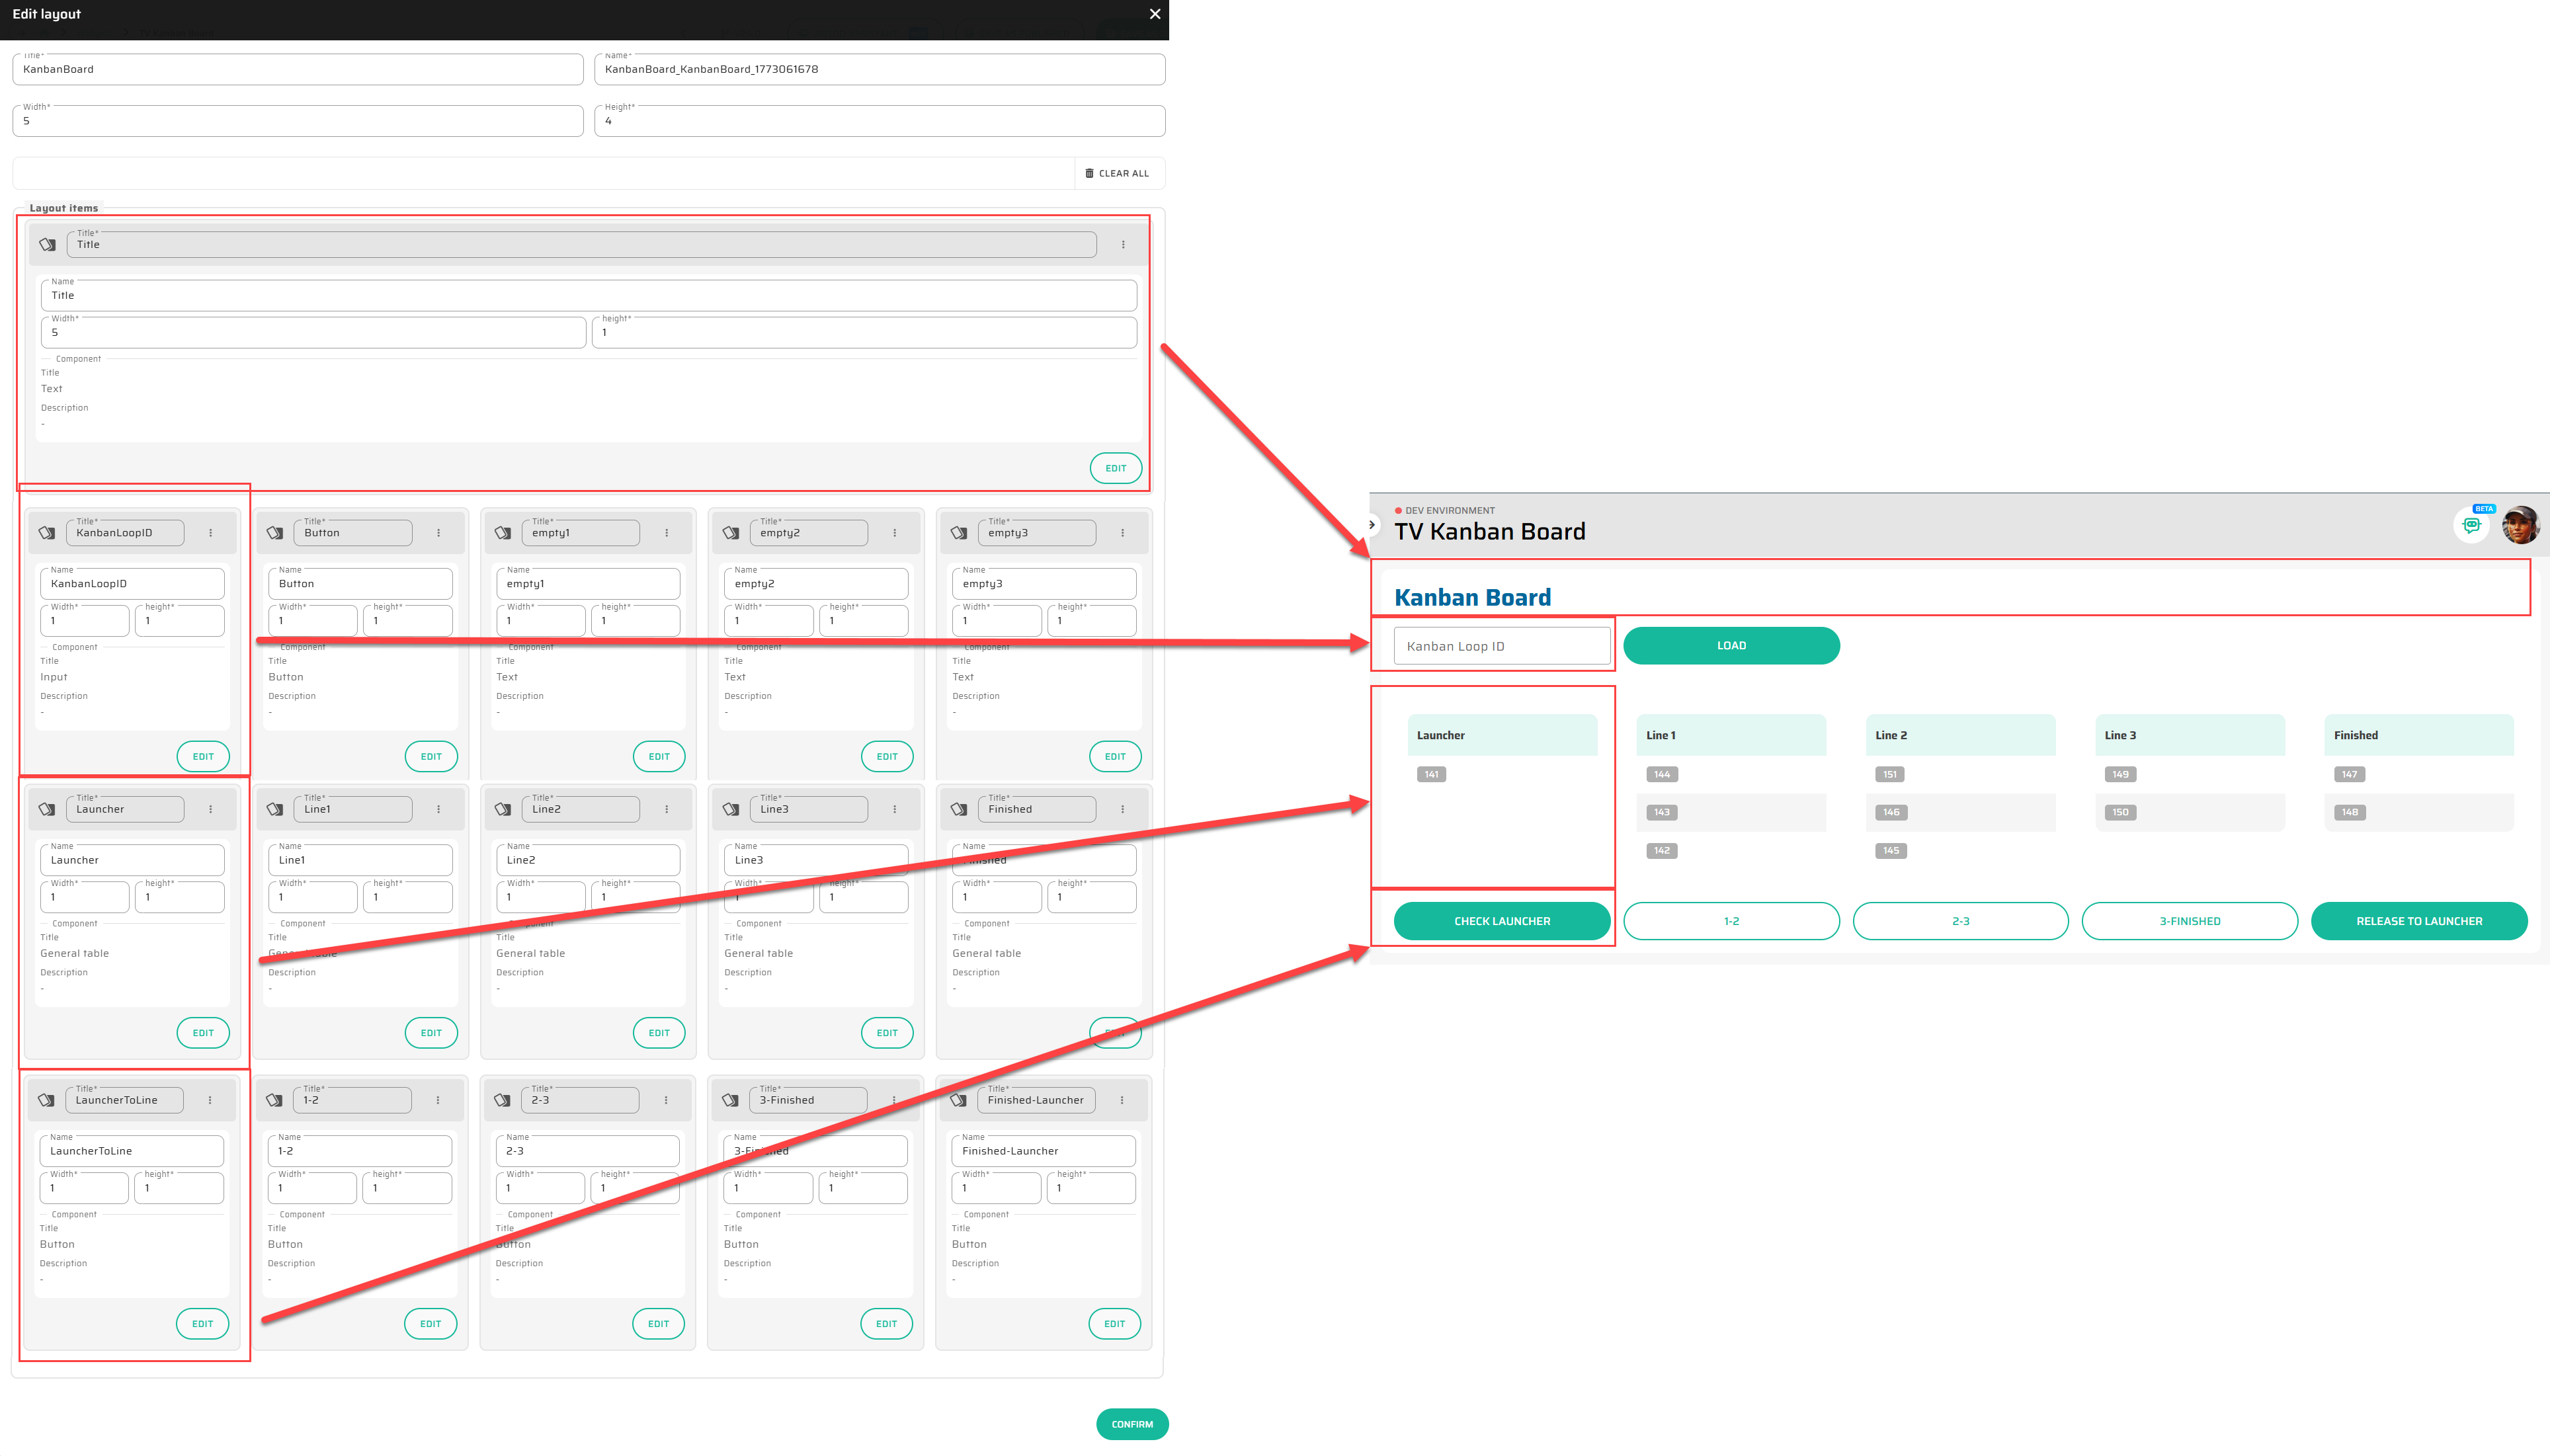
The View node defines what components the users see and how they are placed. Click on the View node to open the Layout editor.
Here, you will drag and drop basic UI building blocks (Components) onto the grid. For our Kanban Board, we need:
Text: For the page title.
Input: A field for the user to type in the specific Kanban Loop ID.
Button: A "Load" button to fetch the data.
General Tables: Five tables representing our columns (Launcher, Line 1, Line 2, Line 3, and Finished).
Buttons (under tables): To trigger the movement of cards between the lines.
Step 3: Configuring the Components
Now we need to tell these visual components what they actually do. Click on the components in your View to edit their settings.
The Input Field: Name it
KanbanLoopID. This creates a variable we can use to load the right data.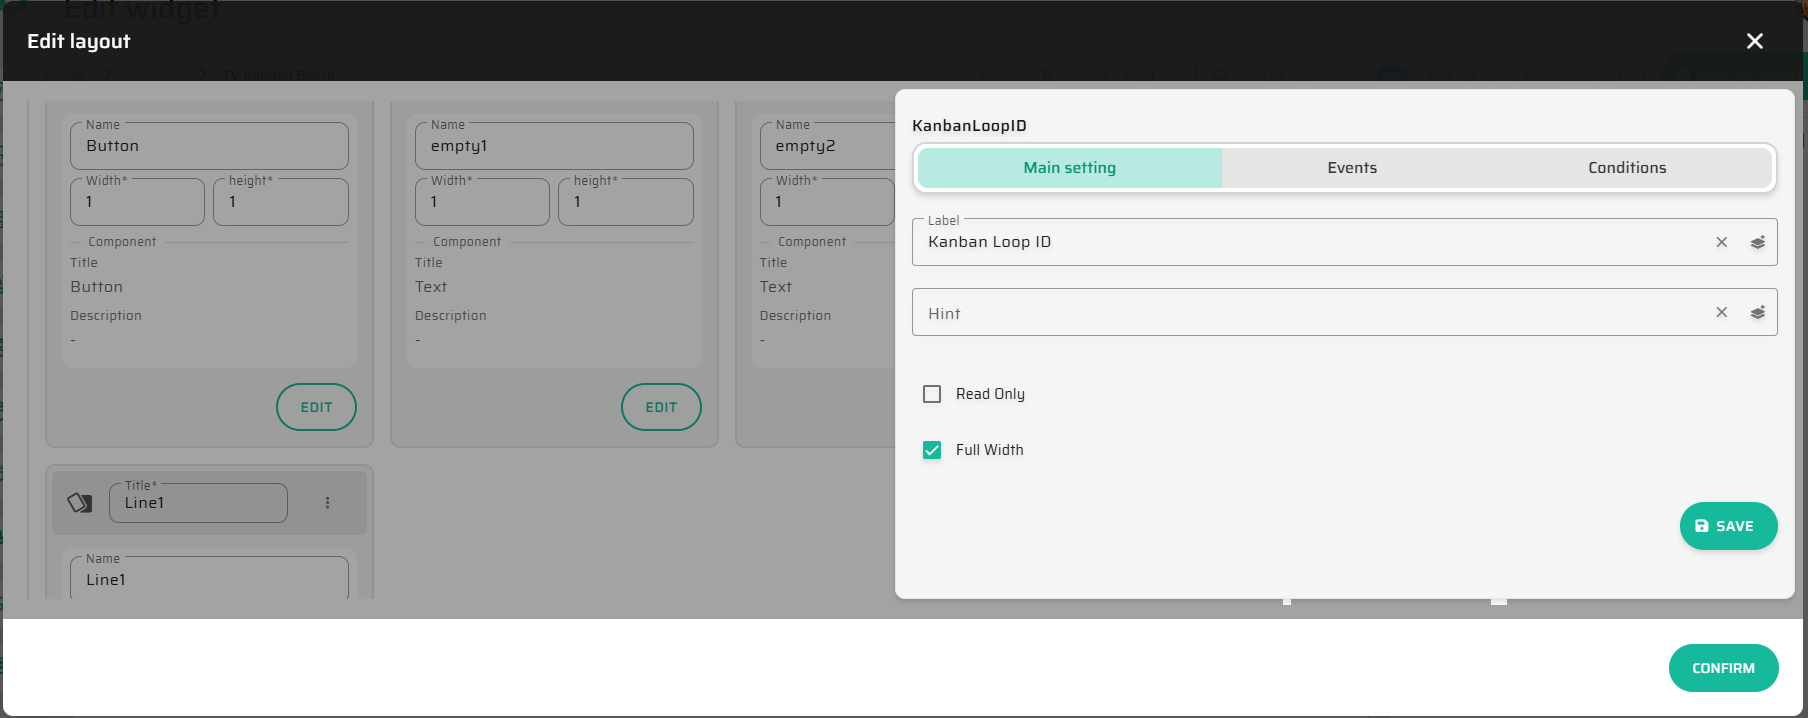
The "Load" Button: Go to the Events tab. Set the
onClickevent to trigger an action. Select the TypeEmitand name the actionLoad.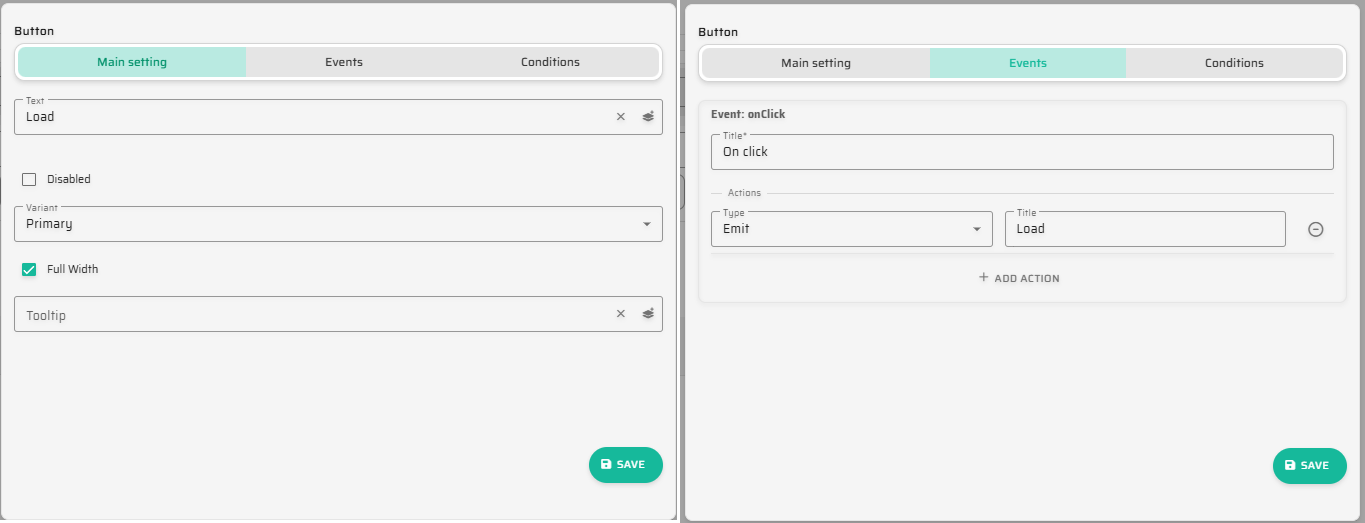
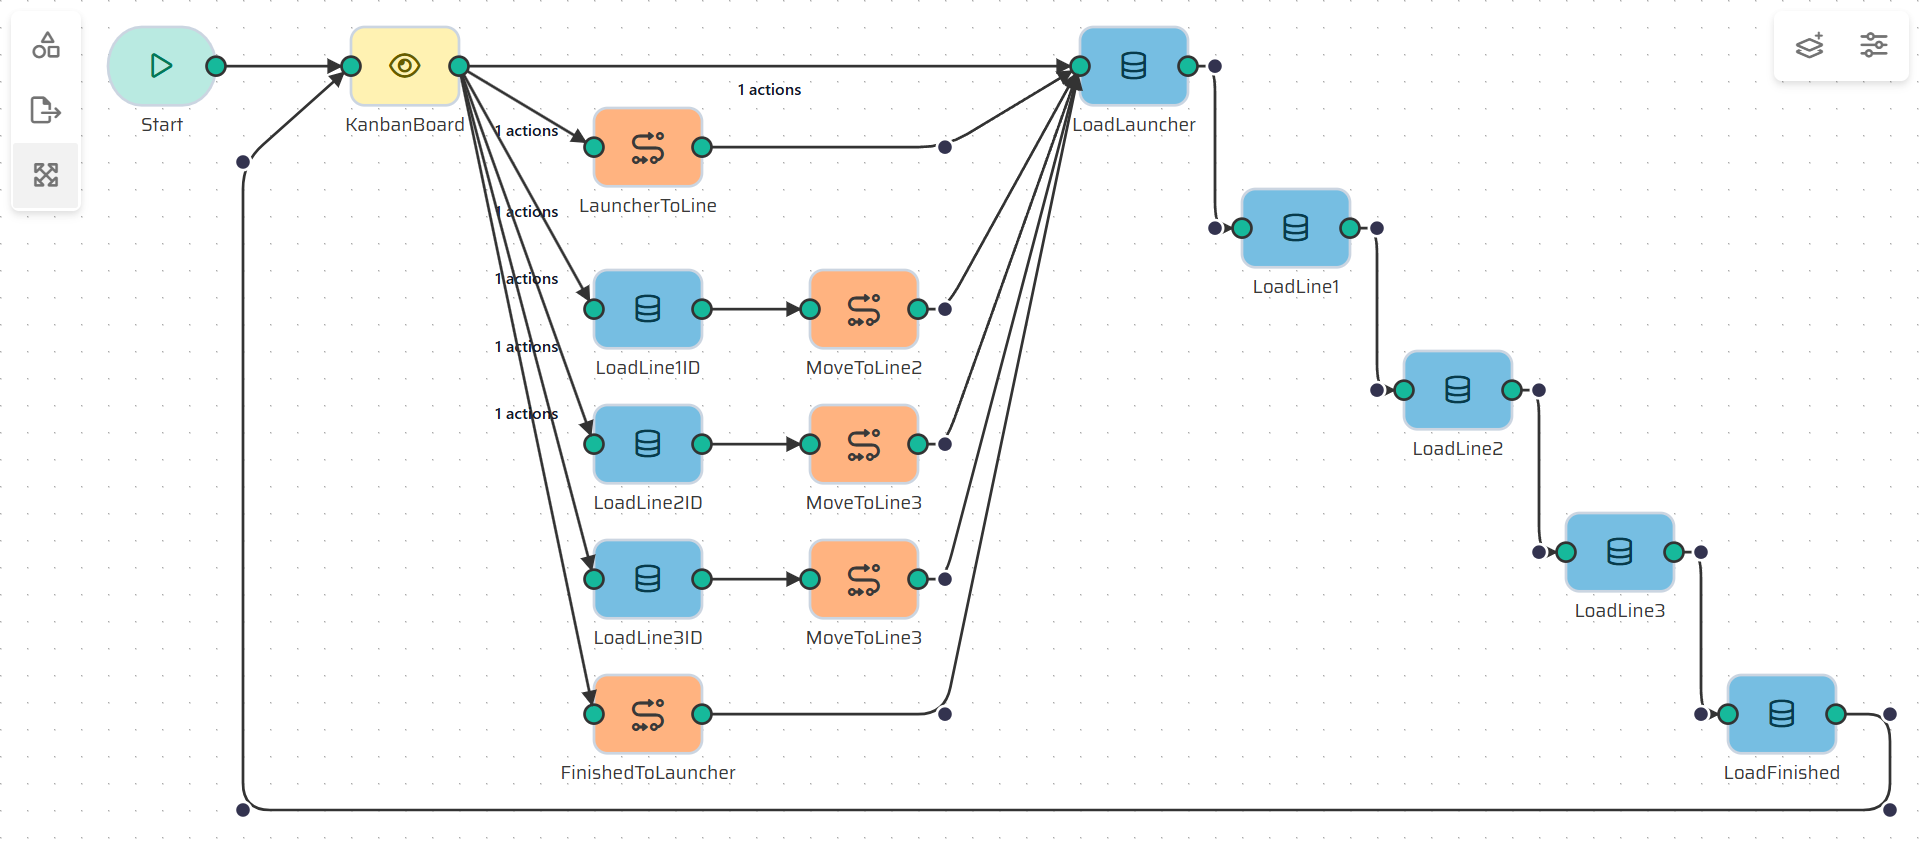
Step 4: Connecting UI to Data (Load Nodes)
When the user clicks "Load", the system needs to fetch the cards. We do this by connecting the View node to Load Object nodes.
Add a Load Object node for the Launcher (e.g., LoadLauncher).
Connect the View node to this Load node.
The system will ask which action triggers this connection. Select your
(onClick) - On click - Loadevent!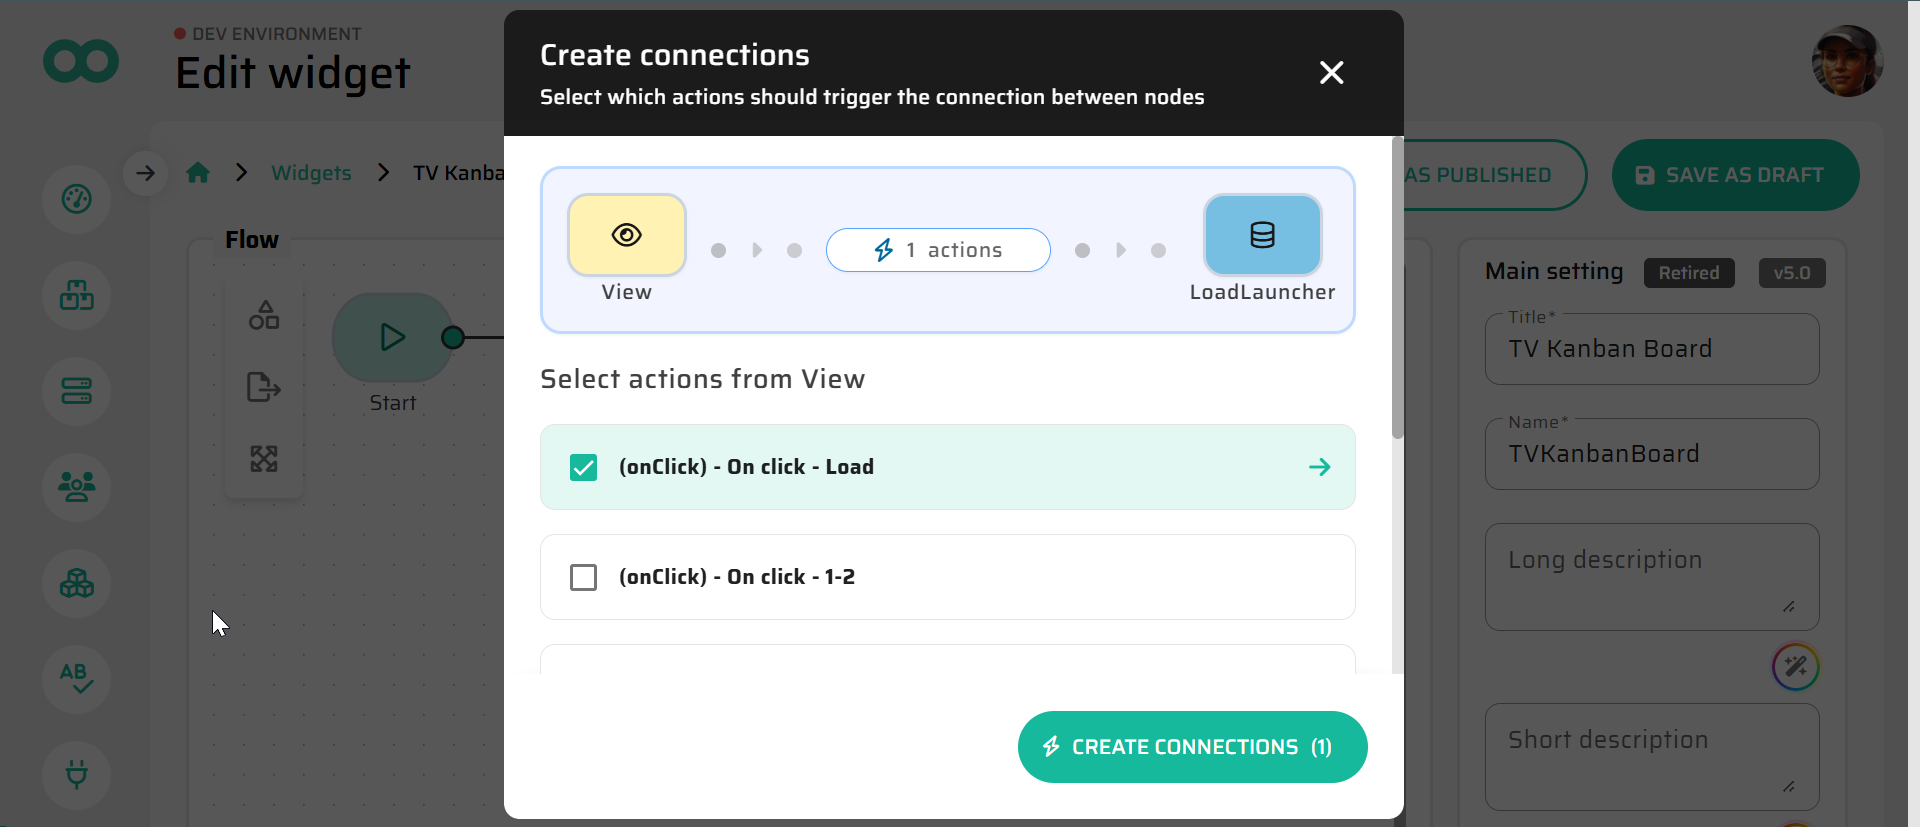
Chain a few more Load nodes together to load the data for Line 1, Line 2, Line 3, and Finished. Use the custom
KANBAN_CARDS_VIEWand filter by theKanbanLoopIDfrom the Input field.The Magic Trick: Connect the very last Load node back to the View node. This tells the Widget to refresh the screen with the newly loaded data.
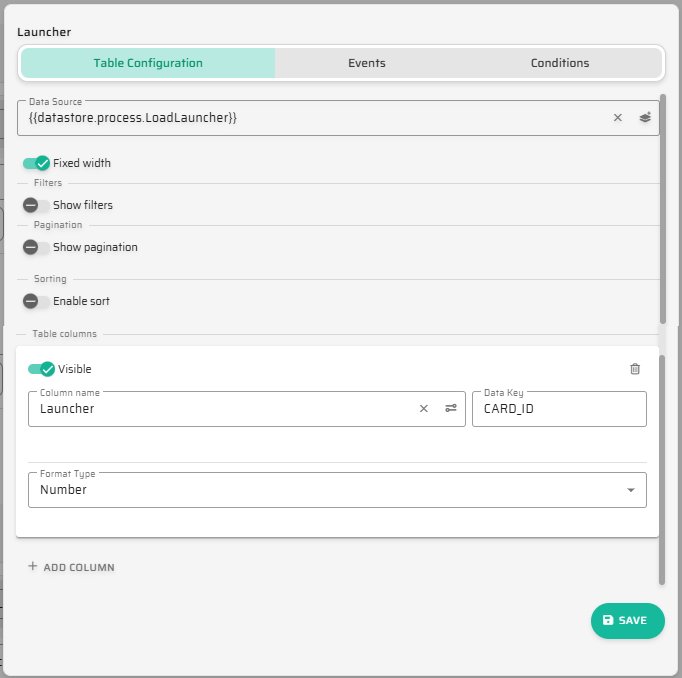
Step 5: Displaying Data in the Tables
Now that the data is loaded into the Widget's memory, we need to map it to the tables.
Open the View node again and edit your General Tables.
Data Source: Select the corresponding Load node from the DataStore (e.g.,
{{datastore.process.LoadLauncher}}).Table columns: Add a column, give it a visual title (like "Launcher"), and map the Data Key to the exact column name from your database view (e.g.,
CARD_ID).
Step 6: Triggering Your Backend Flows!
We have buttons under each table (like "Check Launcher" or "Move to Next Line"). How do we make them actually move the cards?
Edit the button components in the View and set their
onClickevents to emit specific actions (e.g.,LauncherToLine,MoveToLine2, etc.).Outside the View node, add Subprocess nodes to the Widget canvas.
Connect the View node to these Subprocesses, selecting the specific button actions as the triggers.
Configure the Subprocess nodes to execute the Backend Flows you built in Part 2 (e.g., Launcher Logic, Card Transfer Between Lines).
Connect the output of these Subprocesses into your chain of
Loadnodes. This ensures that after a card is moved in the database, the Widget automatically reloads the data and refreshes the screen!
Interactive UI Complete!
You have successfully built the nervous system of your application. The UI now responds to clicks, executes complex backend logic, and dynamically updates the screen without writing a single line of JavaScript.
We are almost done. We just need to put this Widget onto a page and make it accessible to the users. Let's finish the job: ➔ Publishing the App (Layouts & App Structure)