Queries
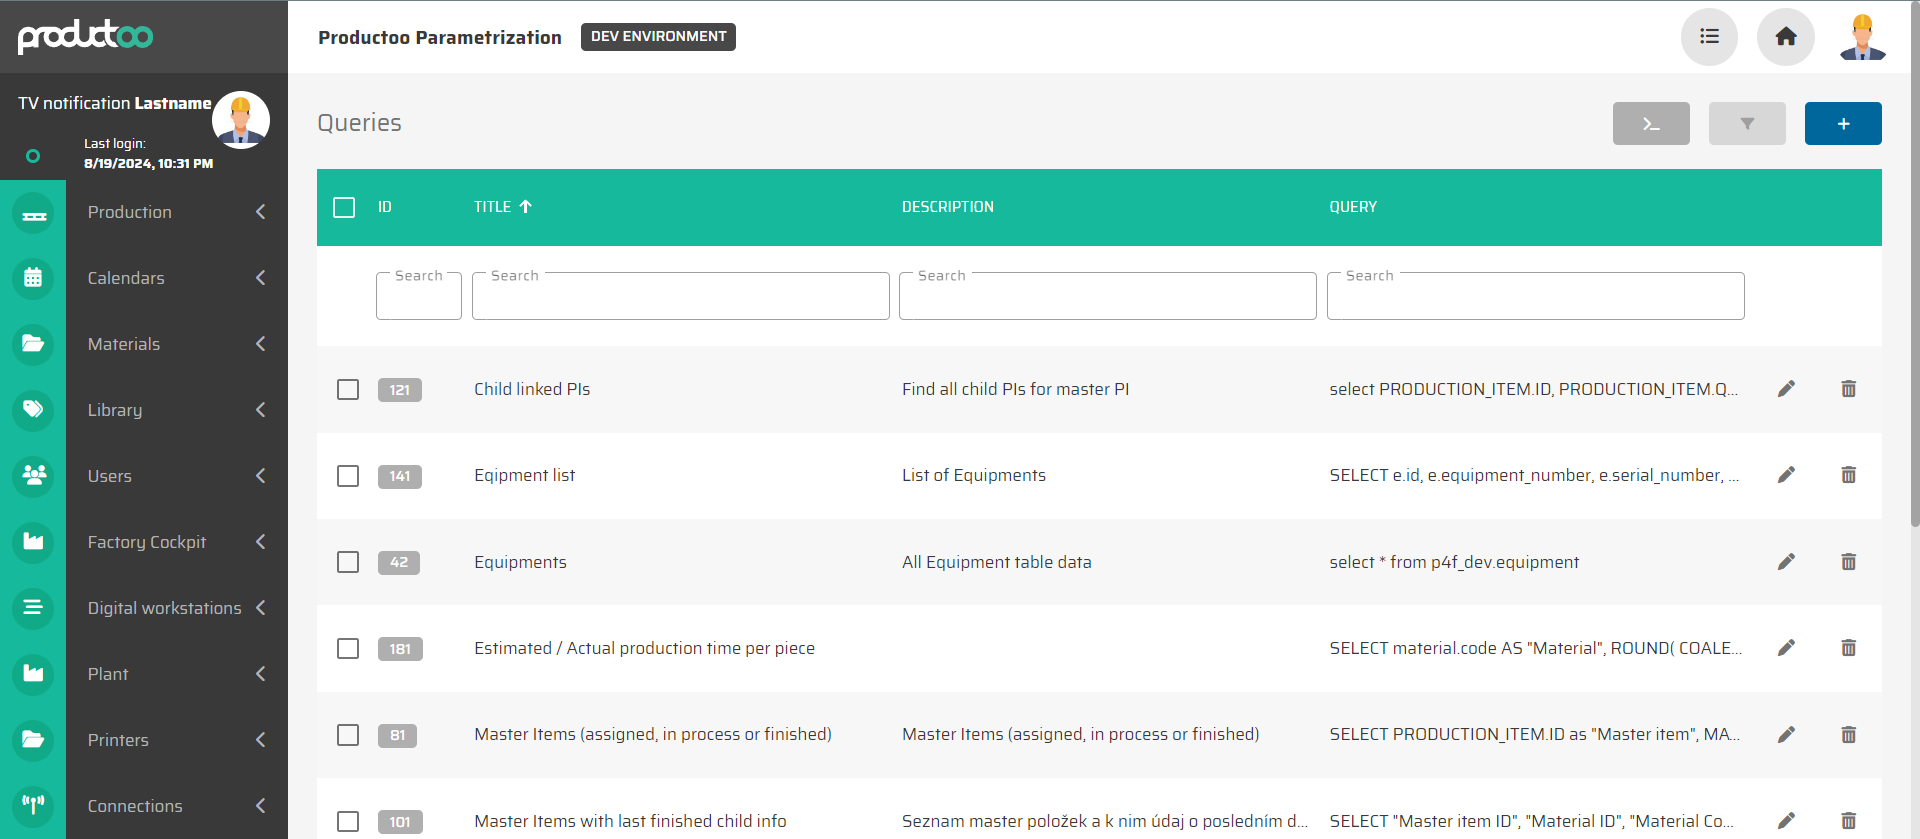
The "Queries" tab, located within the "Parametrization" module of the P4 application, provides users with the powerful capability to execute custom SQL SELECT queries directly against the application’s database through a web interface. This feature is particularly useful for advanced users such as system administrators, consultants, or partners who need to extract data without the need for external tools like SQL Developer.

Quick Query
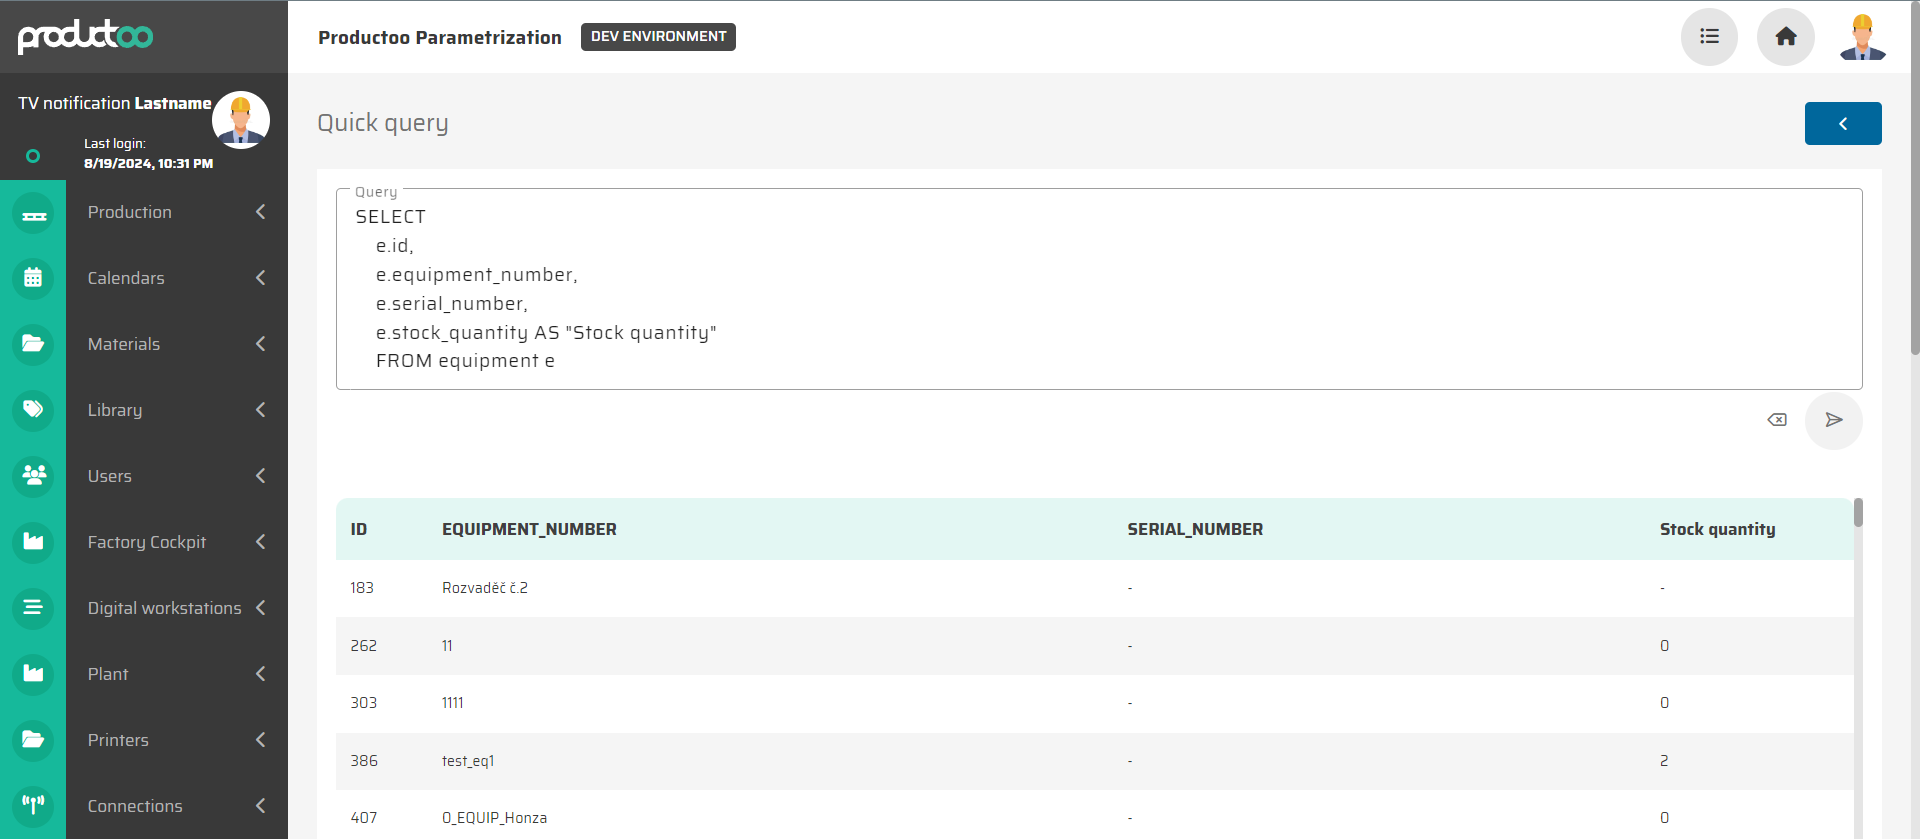
The Quick Query feature allows users to quickly execute ad-hoc SQL queries. The interface is straightforward: users simply enter or paste their SQL SELECT statement into the input field and press the "Execute" button. The query result will be displayed directly below the input field.

Key Features:
Quick Input: A single input field for entering SQL queries.
Immediate Results: Upon execution, results are immediately displayed below the query input field.
Query History: Users can view the last 10 executed queries, making it easy to revisit and reuse previous SQL statements.
How to Use Quick Query:
Enter SQL Query: Write or paste your SQL
SELECTquery into the input field.Execute: Press the "Execute" button to run the query.
View Results: The output will be displayed directly below the input field.
History Access: You can access previous queries from the history list, allowing quick re-execution or modification.
Saving and Managing Queries
Beyond quick, on-the-fly queries, users have the option to save their SQL queries for future use. This is especially useful for frequently used queries that need to be executed regularly.

Steps to Save a Query:
Create Query: click the "+" button to create new query.
Write SQL script: Enter your SQL
SELECTquery in the Query input field.Test the Query: Run the query by pressing the "Execute" button. The query must successfully return data without errors.
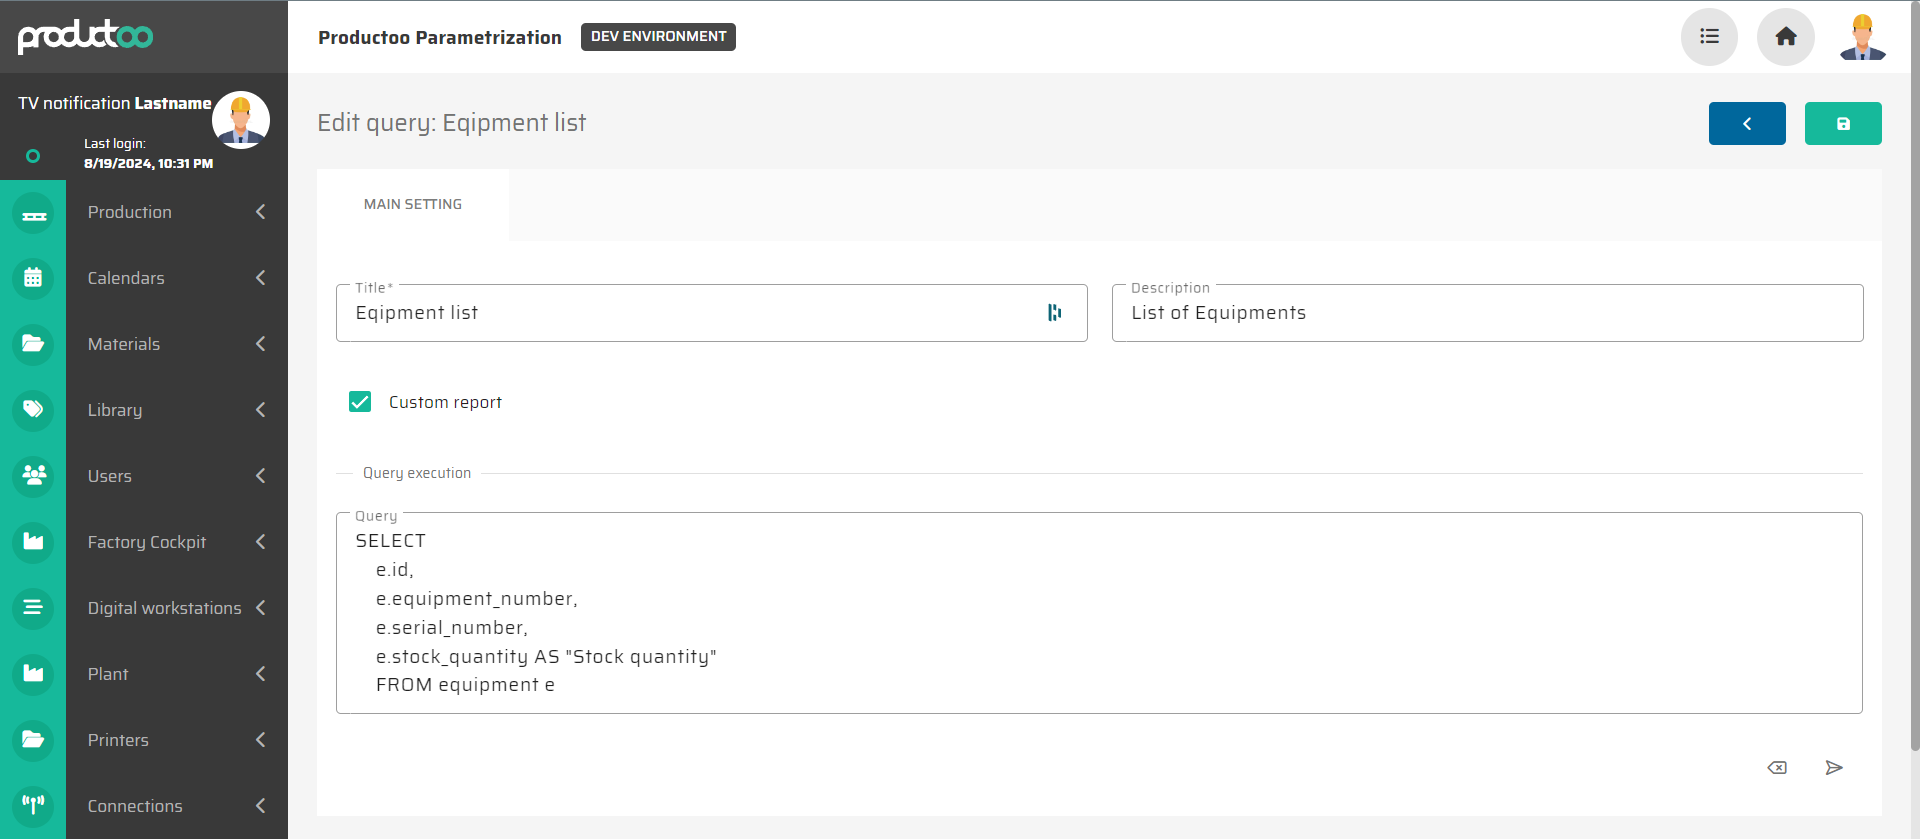
Save Query: You'll be prompted to provide:
Title: A mandatory field where you name your query.
Description: An optional field to describe what the query does or its purpose.
Custom Report Option: Optionally, you can check the box to create a custom report from this query. If this option is selected, the query's output will be made available in the "Production Control" module under the "Reporting" section in the "Custom Queries" tab.
Validation Before Saving:
Execution Requirement: Queries must be executed at least once and return data successfully before they can be saved. This ensures that only functional queries are stored.
Additional Notes:
Editing Saved Queries: Saved queries can be edited or deleted as needed. Each saved query has options to modify or remove it directly from the list.
Custom Reports: Queries marked as custom reports can be easily accessed within the reporting tools of the application Custom Reports , providing greater flexibility in how data is analyzed and shared among other users.
