Operator's Guide
This guide explains how operators use the Time & Attendance features directly from their workstation.
Everything an operator needs — signing in, viewing their schedule, requesting leave, and reviewing their attendance history — is available within the Operators tab on the declaration screen.
This ensures that daily attendance is simple, traceable, and requires no additional tools or training.
Accessing the Operators Tab
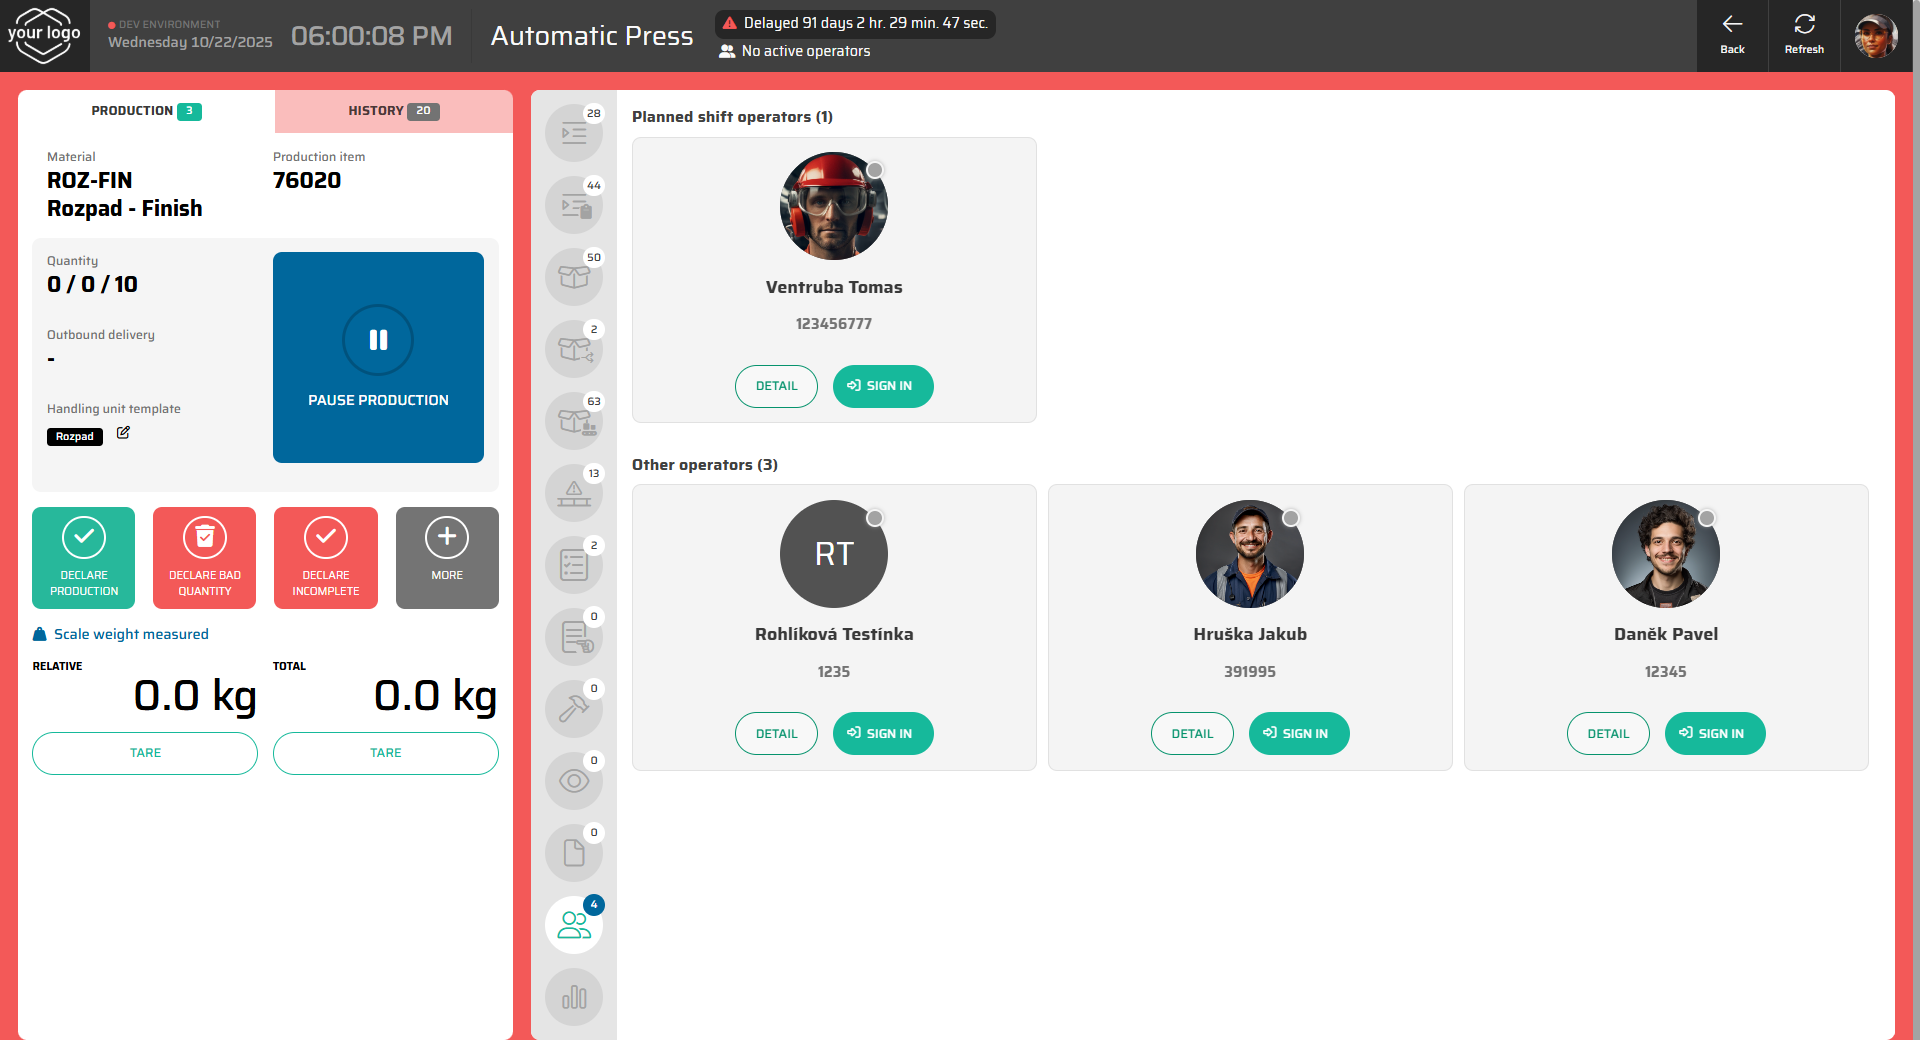
From the declaration screen at your workstation, open the Operators tab (the last option in the menu).
This section shows all operators who are authorized to work at the current workstation.
The view is divided into two parts:
Planned Shift Operators – operators scheduled for the current or next shift.
Other Operators – all other users with access to this workstation.
Signing In
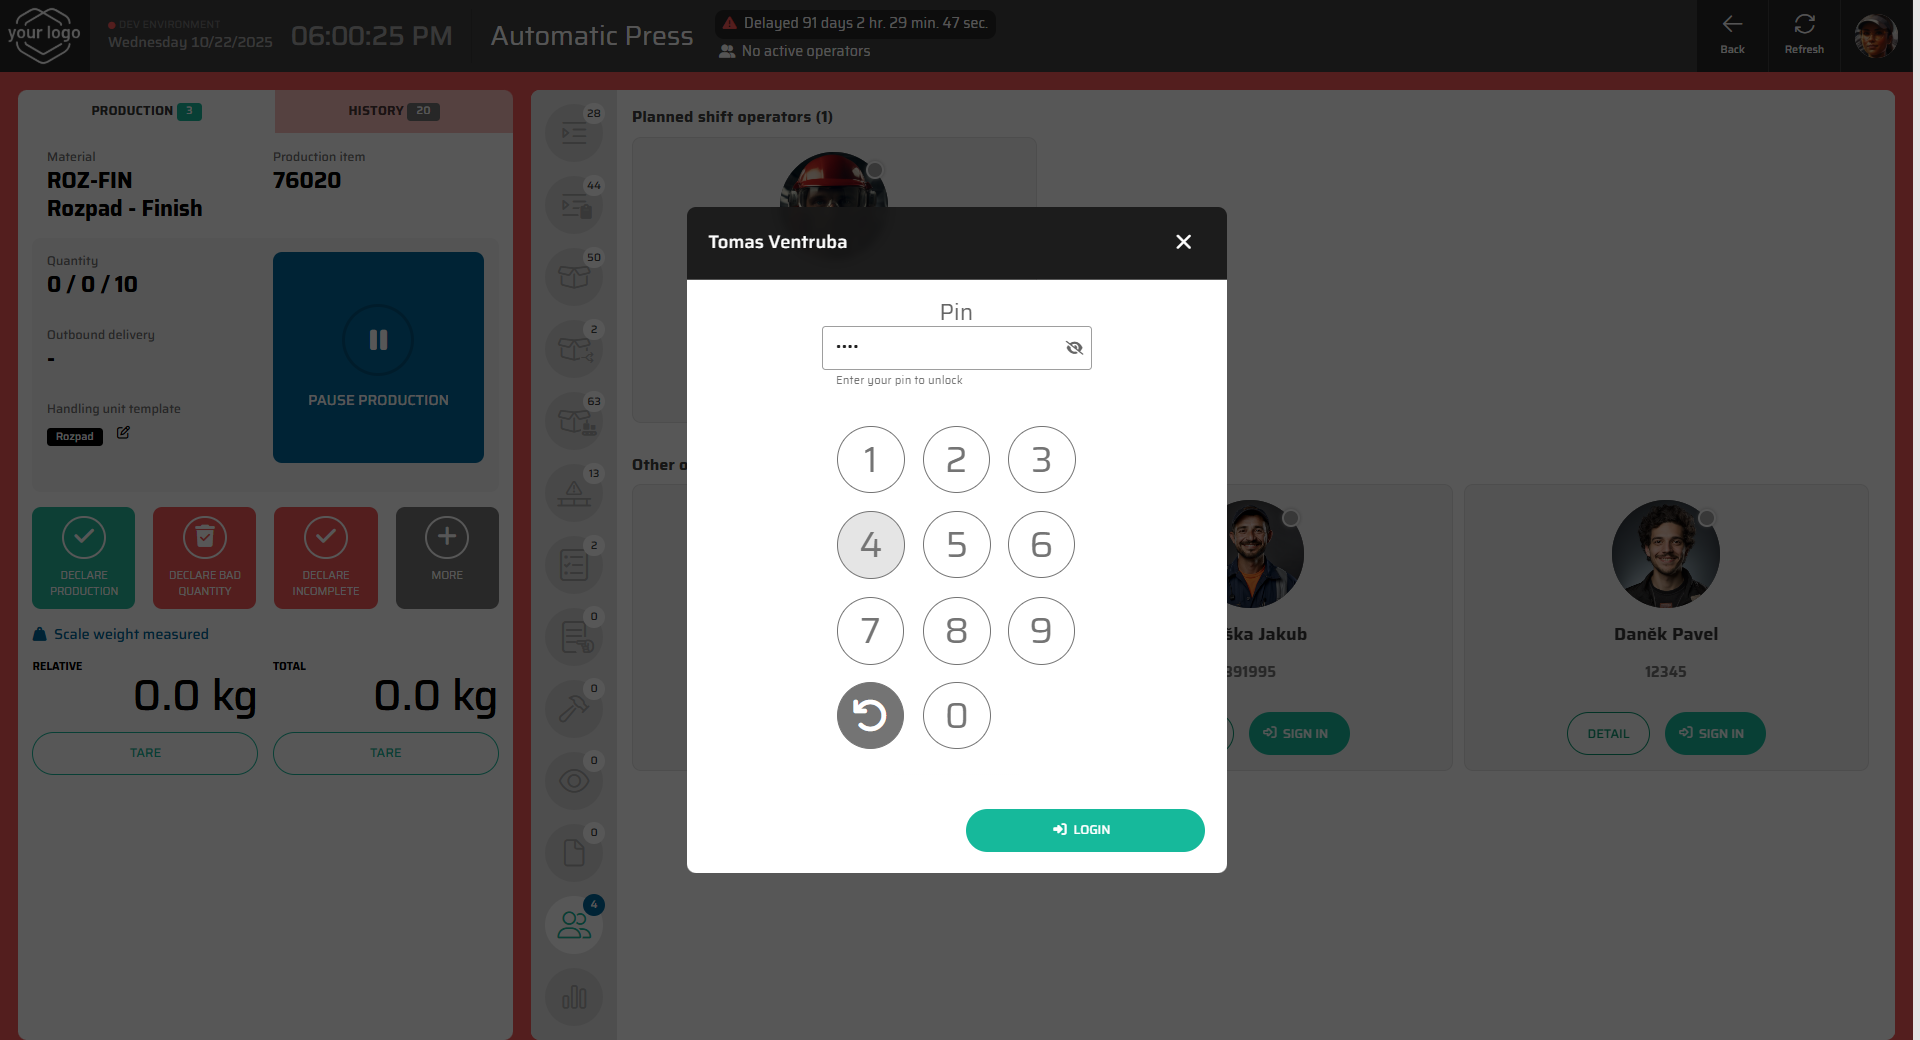
To start working, find your name in the list and click Sign In.
You can log in in one of two ways:
By PIN – the system opens a numeric keypad where you enter your personal code.
By RFID card – simply tap your assigned card on the connected reader.
Once signed in:
The indicator next to your name turns green.
Your name appears in the header of the declaration screen, confirming that you are the active operator at this workstation.
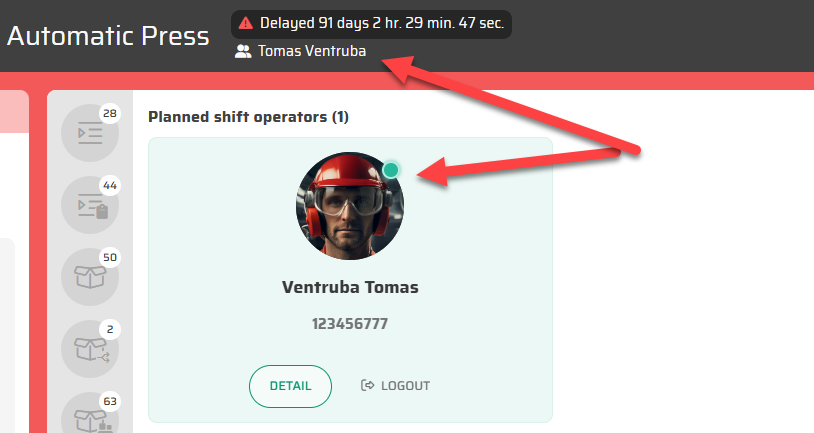
If you finish your shift, you can sign out using the Logout button next to your profile.
Viewing Your Profile
Click Detail under your name to open your personal profile window.
This window has three main tabs: Detail, Leave Requests, and Attendance.
Detail Tab
The Detail tab shows your basic information — name, personal number, and team membership.
It also displays your personal calendar, where you can see:
All planned shifts and their times.
Approved or pending leave requests, highlighted in different colors.
This view helps you quickly check when you are scheduled to work and when you have approved absences.

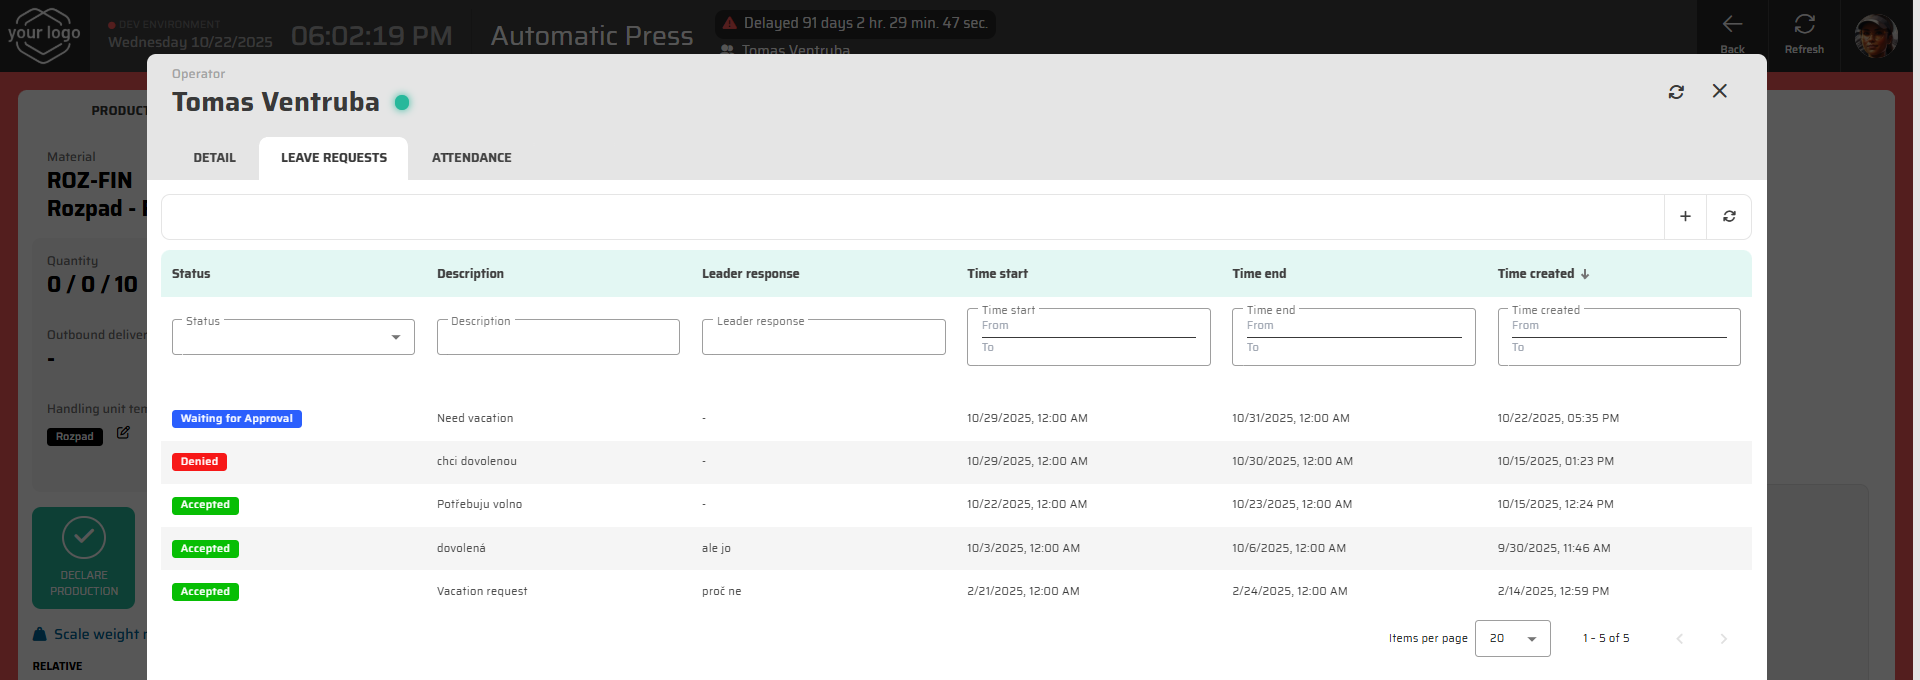
Leave Requests Tab
In this tab, you can view and manage all your absence requests — both past and upcoming.
Each record shows:
Status (Waiting for Approval, Accepted, Denied, Finished)
Description and reason
Team Leader’s response or comment
Start and end time
To create a new request:
Click Create New Record in the top-right corner.
Enter the date and time range for your absence and a short comment (e.g., “vacation” or “doctor appointment”).
Confirm to submit.
Your new request will appear in the list with the status Waiting for Approval until your Team Leader reviews it.
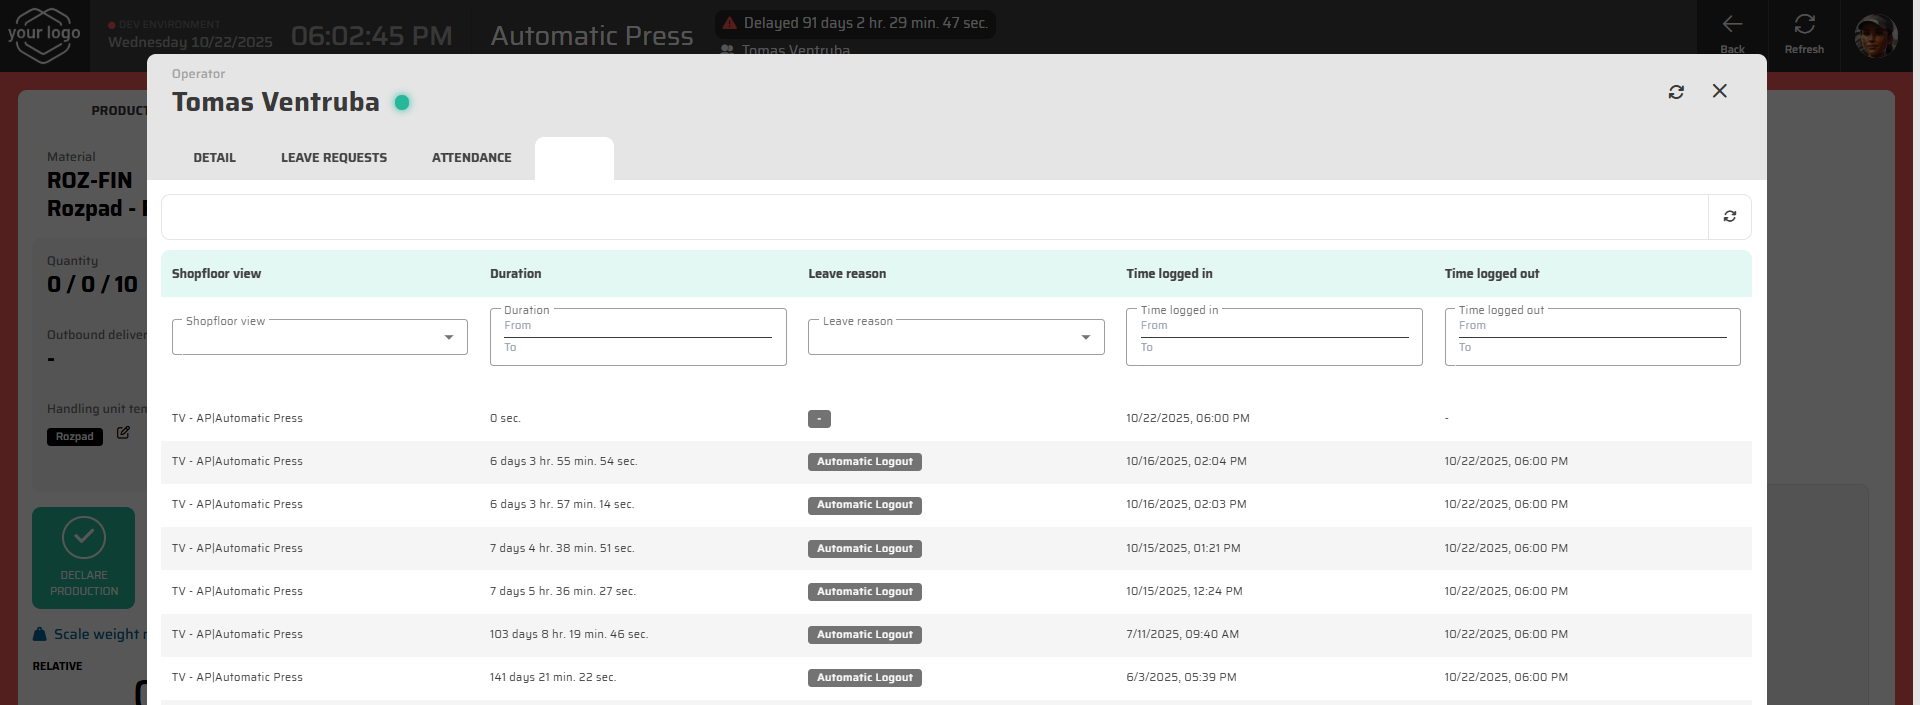
Attendance Tab
The Attendance tab shows your work history — a log of when and where you were signed in.
Each entry contains:
The workstation or shopfloor view where you were logged in,
The duration of your session,
The login and logout times,
The logout reason (e.g., automatic logout at shift end).
This helps you track your work time and verify your attendance records.
Summary
With these simple tools, operators can:
Sign in and out quickly using a PIN or RFID card,
View upcoming shifts and approved leaves,
Submit and track absence requests,
And review their own attendance history — all in one place.
The system automatically records all actions for traceability and integrates them into the team’s overall attendance overview.