How to Configure User Roles
User Roles in the P4 application allow administrators to manage and customize access permissions, notifications, and module visibility for different groups of users. This guide provides a step-by-step overview of creating, editing, and managing user roles, including critical configurations in Main Settings, Permissions, Notifications, and Modules.
Accessing the User Roles Section
Navigate to the User Management Section
Open the Parametrization module from the main dashboard.
Expand the Users section in the left-hand sidebar and click on User Roles.
View Existing Roles
The list of existing roles will appear, showing details such as ID, Title, Description, and System Name.
Use the search bar to quickly find specific roles.

Add or Edit Roles
To create a new role, click the Add (+) button.
To modify an existing role, click the pencil (edit) icon next to the role.
Configuring a User Role
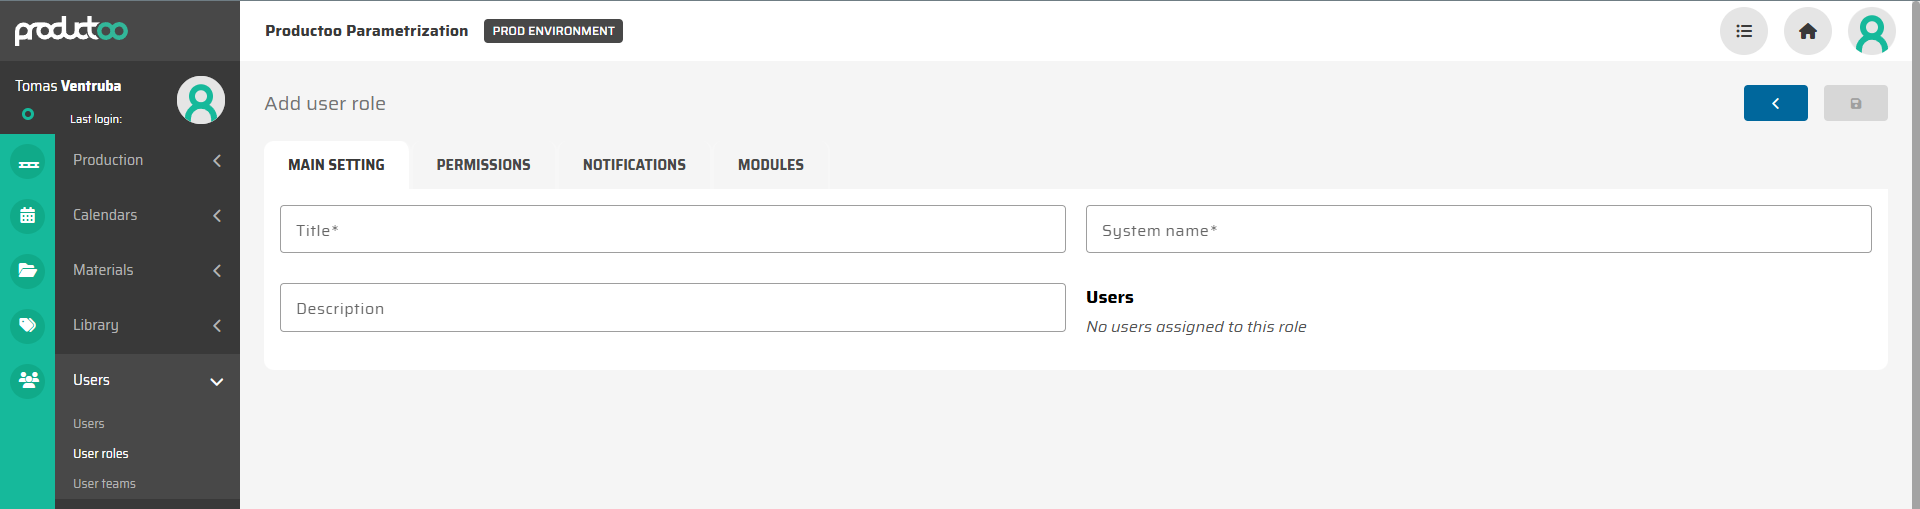
1. Main Settings
In the Main Setting tab, configure the following:
Title: Enter a name for the role, such as "Production Planner" or "Technician".
System Name: Provide a unique identifier for the role.
Description: Add a description of the role’s purpose to provide clarity for administrators.
2. Permissions
In the Permissions tab, define the access rights available to this user role. This includes enabling specific features or limiting access based on organizational policies. Examples include:
Granting access to advanced editing features.

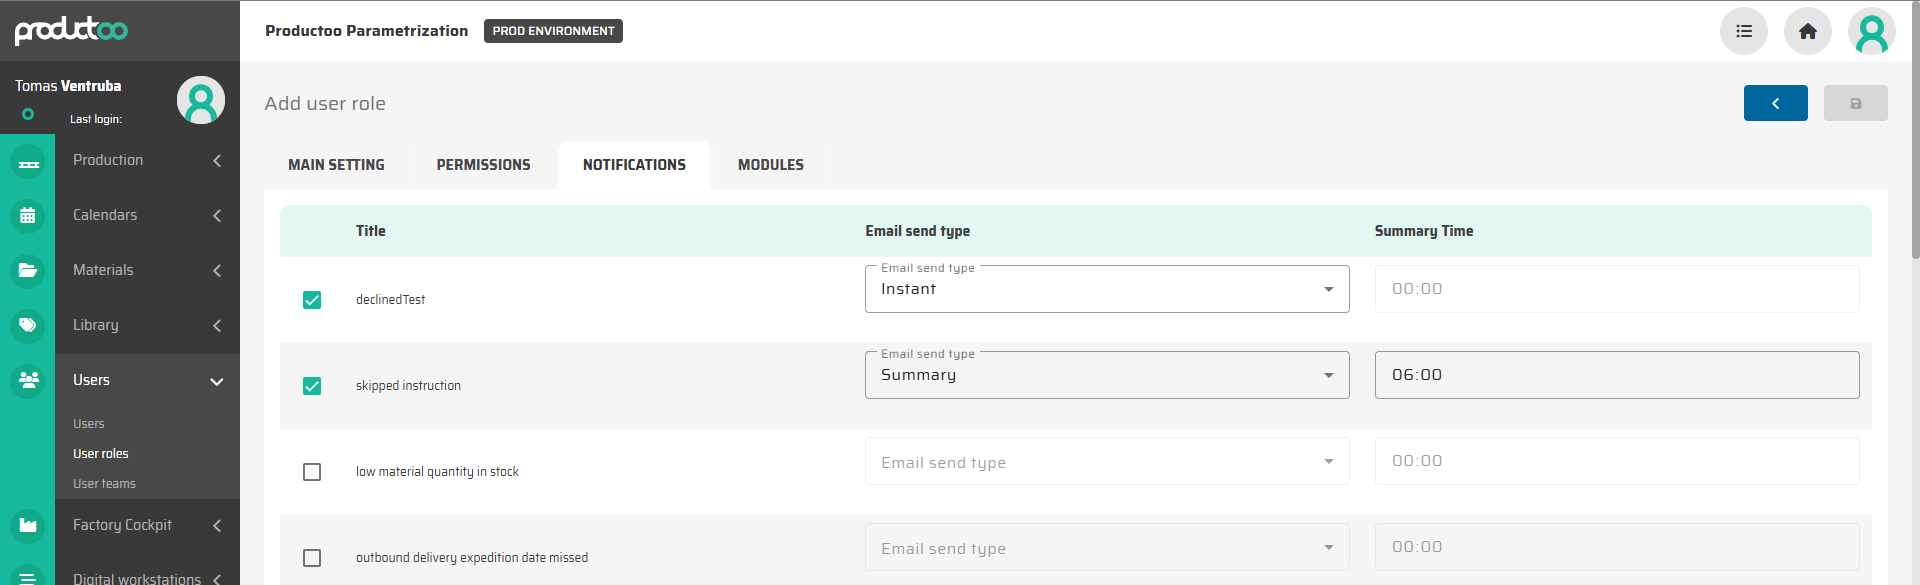
3. Notifications
The Notifications tab allows you to manage email alerts for users assigned to this role.
Email Types: Select from a predefined list of email notifications, such as “Declined Test” or “Skipped Instruction.”
Send Type: Choose whether notifications should be sent:
Instantly after a trigger event occurs.
As a Daily Summary, at a specific time.
Refer to the Email Notifications Documentation for a detailed description of each notification type.
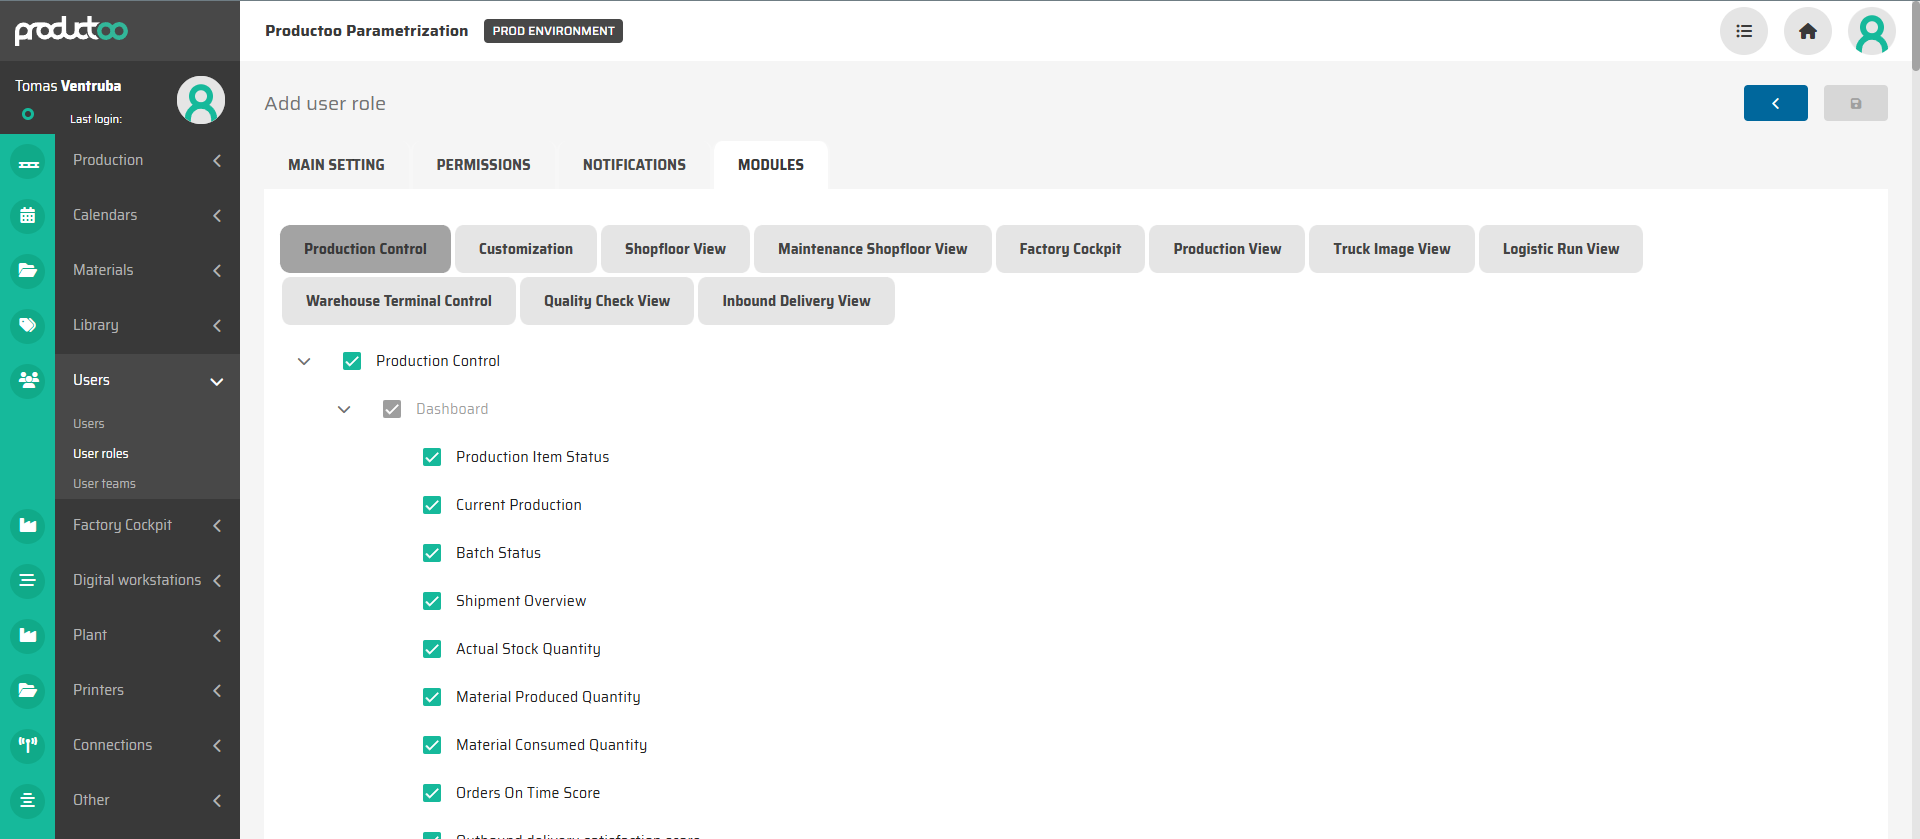
4. Modules
The Modules tab is the critical area where you define visibility and restrictions for users in this role:
Module Access: Specify which modules (e.g., Production Control, Factory Cockpit) are accessible.
Tabs, Fields and Buttons: Drill down into individual modules to configure access to specific tabs, fields, or even buttons.
Customization: Restrict visibility based on organizational or functional requirements.
Best Practices for Managing User Roles
Start with Predefined Roles: Use the existing roles as templates and customize them as needed.
Test New Roles: Assign test accounts to newly created roles to ensure the configurations align with intended functionality.
Regularly Review Roles: Periodically review and update roles to reflect changes in organizational structure or responsibilities.
Keep Descriptions Clear: Use descriptive titles and explanations for roles to minimize confusion among administrators.
Next Steps
Once the User Roles are configured, proceed to User Management to create user accounts and assign roles.