Dimension 2 (Interactivity) – Designing Your User Experience
The "Nervous System" of Your App: Widgets
If the Flow Builder we used on the previous page is the "Brain," then Widgets are the "Nervous System". A Widget is the bridge between what your users see on the screen and the logic that runs behind the scenes.
Widgets define how the application behaves. They take human actions - like clicking a button, choosing an item from a list, or typing text - and translate them into system commands.
Why It’s Powerful and Simple
Turning Visuals into Actions: You don't just place a button; you give it a "job". One button might save data, while another triggers a complex manufacturing report.
Live Feedback: Widgets are "reactive". This means they can instantly refresh the screen or show a success message as soon as a process finishes, providing a smooth experience for the user without any custom programming.
Mix and Match: Because Widgets are modular, you can build a perfect interactive tool by simply combining basic building blocks (Components) like tables, inputs, and charts.
Hands-On: Building the Notification Panel
We will now create the interactive composer where your administrators will type their news.
Step 1: Initialize the Widget
Navigate to Configuration Studio → Process Builder → Widgets and click to create a new one.
Name it
Notification Portal Widget.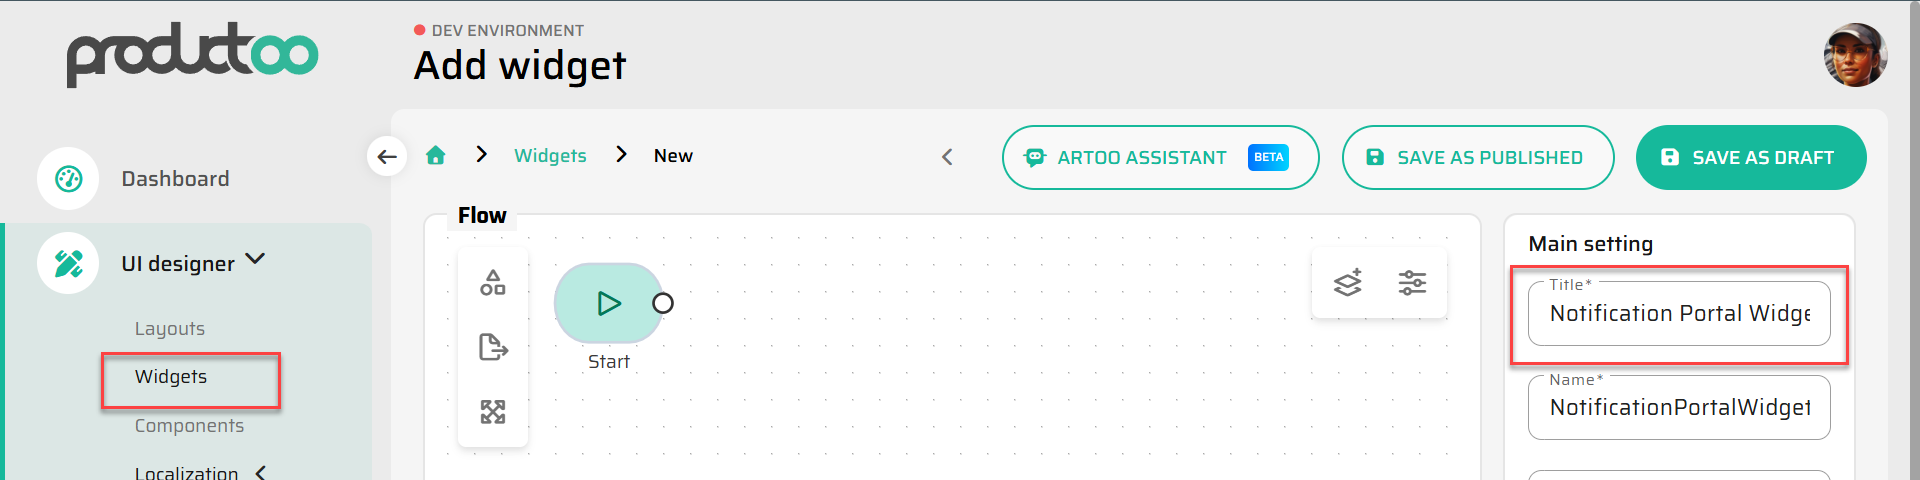
Step 2: Assembling and Configuring Components
Click on the View Node to open the visual layout editor.
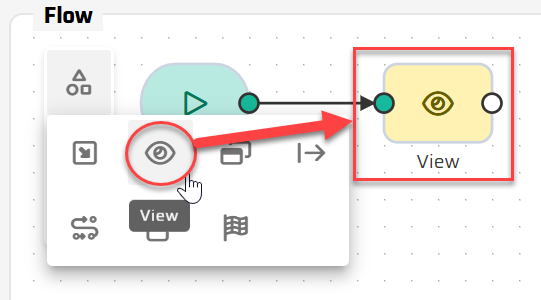
Add the following components onto your grid and configure their specific properties:

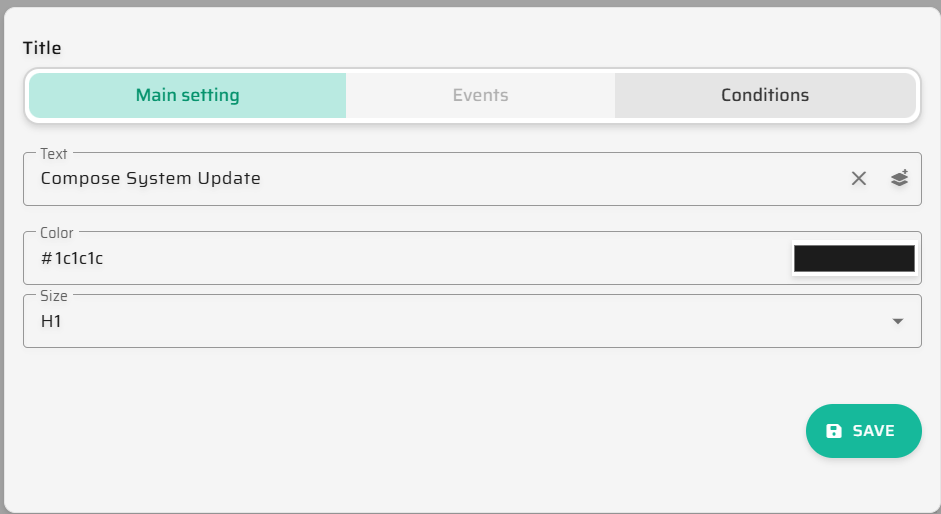
Text Component (Header):
Content: Type "Compose System Update".
Style: Choose your color and set the size to H1 or H2.
Grid: Define its width and height in the grid (e.g., full width).
Input Component (Subject):
Label: "Email Subject".
Hint: "e.g., Important System Update".
Status: Ensure the "Read Only" checkbox is unchecked.
Input Component (Message Body):
Label: "Message Content".
Hint: "Type your notification here...".
Button Component (Trigger):
Label: "Send Notification Now".
Events Tab: Create a new On click action. Set the Type to Emit and name the action
Send.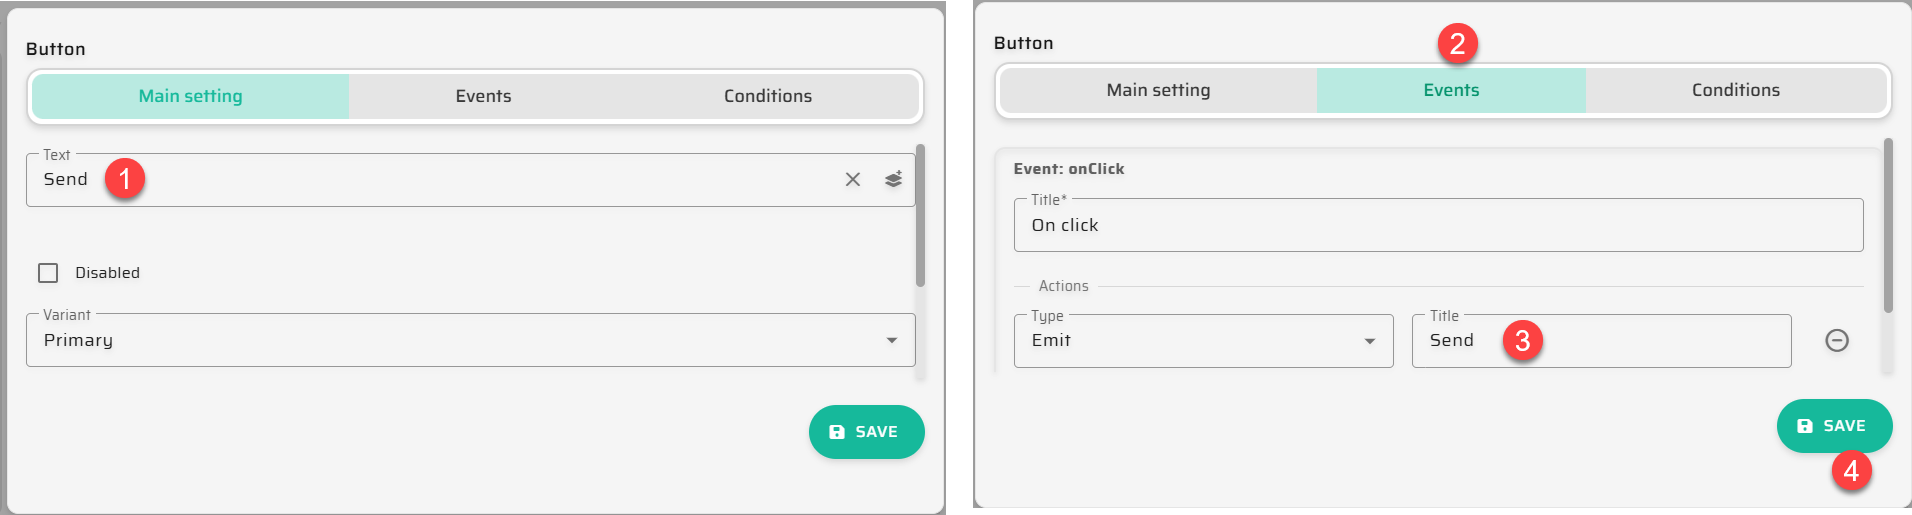
Step 3: Connecting UI to the "Brain" (The Flow)
Now we link the visual "Send" signal to the backend logic:
Exit the visual editor and add a Flow node to the Widget canvas.
Select the
Sent Notification To Roleflow you published on Page 2.
Connect the View node to the Flow node. When asked for the trigger, select your
Sendaction.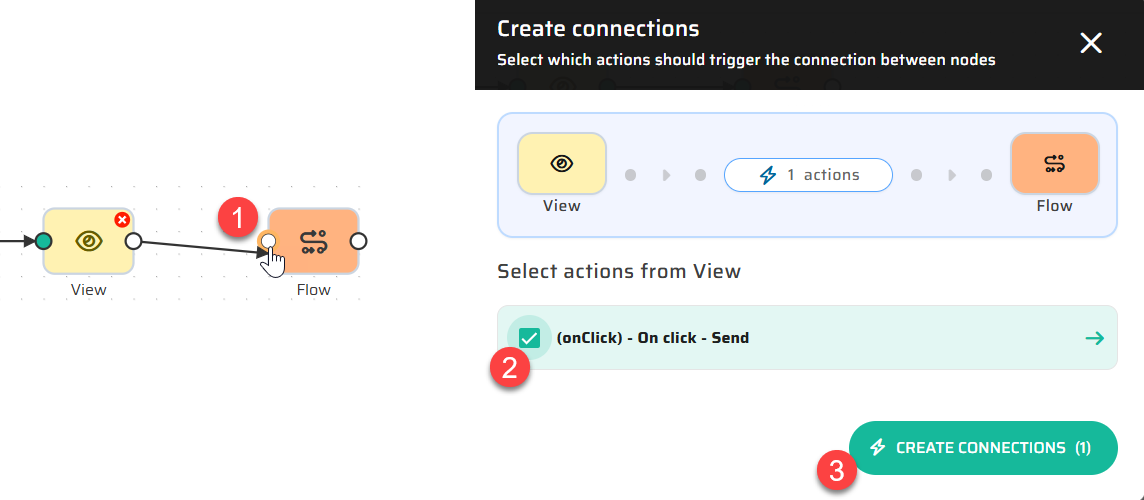
Link the Data: Map the Flow's inputs (
SubjectandMessage) to the values from your UI Input components.
Step 4: Closing the Loop (Refreshing the UI)
This is a "Magic Trick" for responsiveness:
Connect the output of your Subprocess node directly back to the View node.
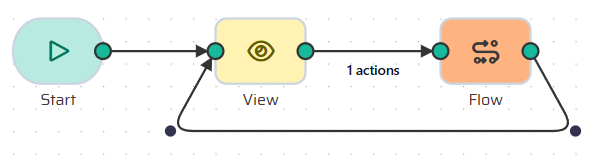
What is happening: You are closing the circuit.
Why it matters: Without this connection, the screen would go blank after the email is sent. By returning to the View node, the system re-renders the page, allowing the admin to see the composer again and send another update if needed.
Next Step:
Your interactive tool is now a complete functional unit! However, it is still "floating" in the system. We need to give it a permanent home. Proceed to Dimension 3 & 4: Composing Your Application Page and Menu