Dimension 1 (Logic) – Defining Your Business Rules
The "Brain" of Your Application: The Flow Builder
The Flow Builder is where you define the invisible logic of your system. It tells the platform exactly what should happen behind the scenes when a user clicks a button or a specific event occurs.
Instead of writing lines of complex code, you use a visual, drag-and-drop tool to map out your process.
Why It’s Powerful and Simple
Visual Building Blocks: You build your logic using "Nodes"-visual blocks that each perform one specific task, like loading data or sending an email.
Built for Reusability: Once you create a flow, it is a self-contained component. You can build a logic once and reuse it across many different parts of your application.
The "Safe Save" Rule: One of the best parts is that nothing is permanently changed in your real database until the process successfully reaches the very last step (the End Node). If something goes wrong in the middle, the system simply resets, keeping your data clean and safe.
Hands-On: Creating Your First Action
To demonstrate how easy this is, we will build the logic to send an email notification.
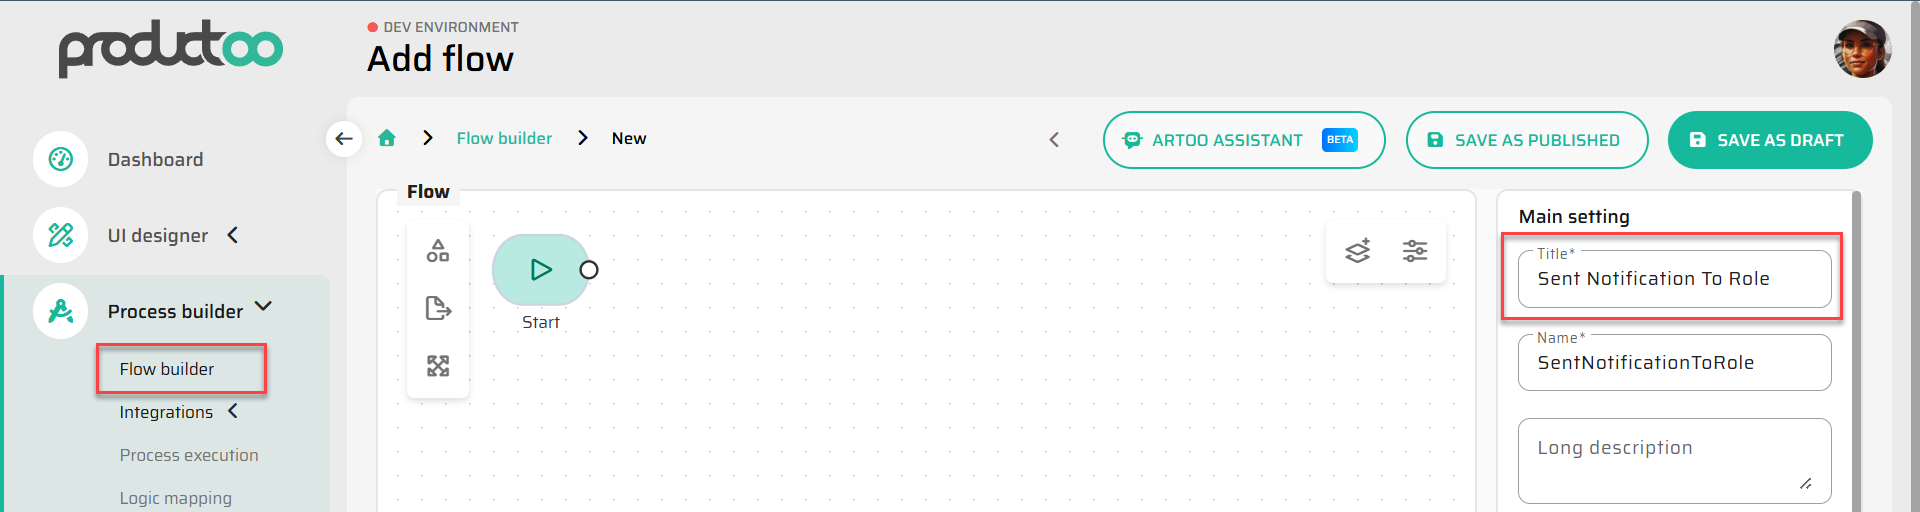
Step 1: Start Your Flow
Go to Configuration Studio → Process Builder → Flows and click New.
Name it “Send Notification to Role”.
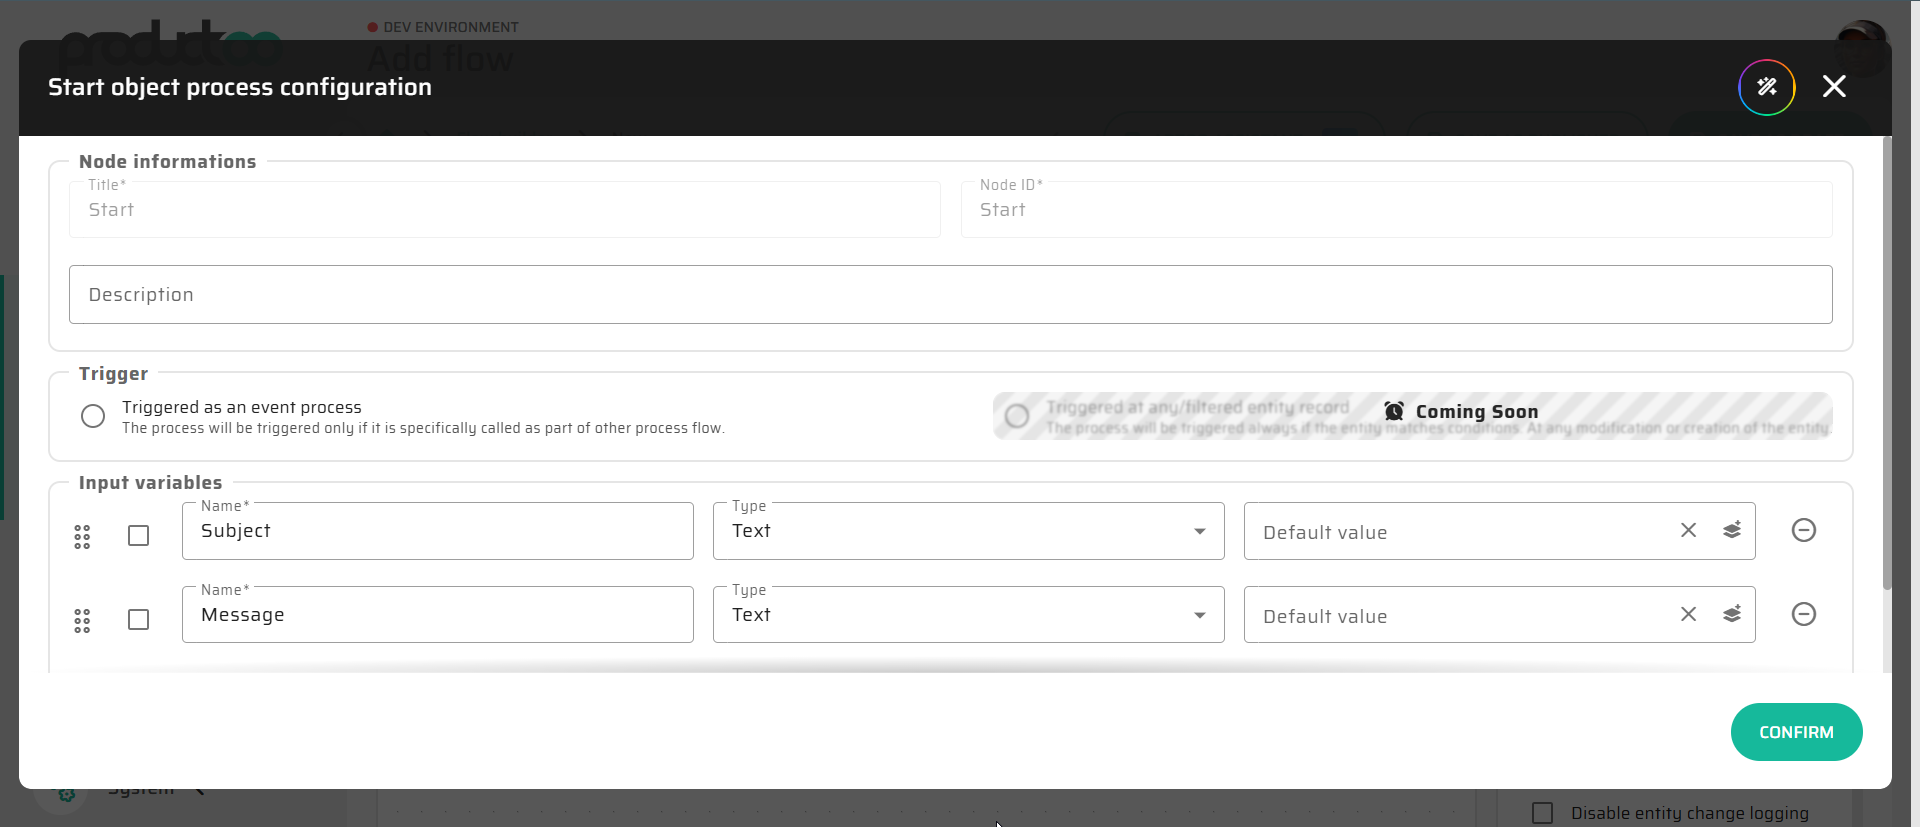
Step 2: Define What the Flow Needs (Start Node)
Double-click the Start Node to set up the "inputs" - the information the flow needs to work. We need two pieces of text from the user:
Subject (e.g., "System Maintenance").
Message (e.g., "The system will be down for 10 minutes.").
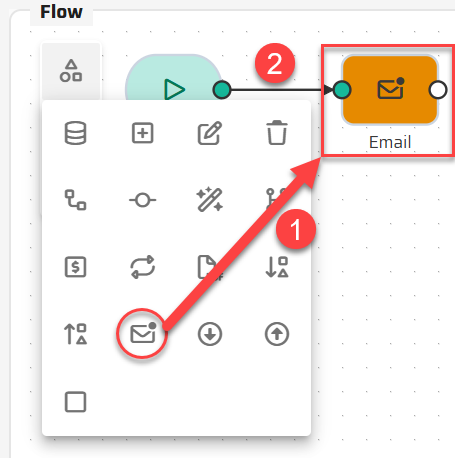
Step 3: Add the Email Action
Drag an Email Node onto the workspace.
Connect it to your Start Node.
What is happening: By drawing a line between these two blocks, you are establishing the "pathway" of the logic.
Why it matters: Just like a sentence is made of words, a process is made of nodes. This connection tells the system: "As soon as you receive the information from the user, immediately proceed to the email action".
Step 4: Configuring the Action (Bridging the Data)
Double-click the Email Node to open its settings.
In the Roles field, select the
General Notificationgroup.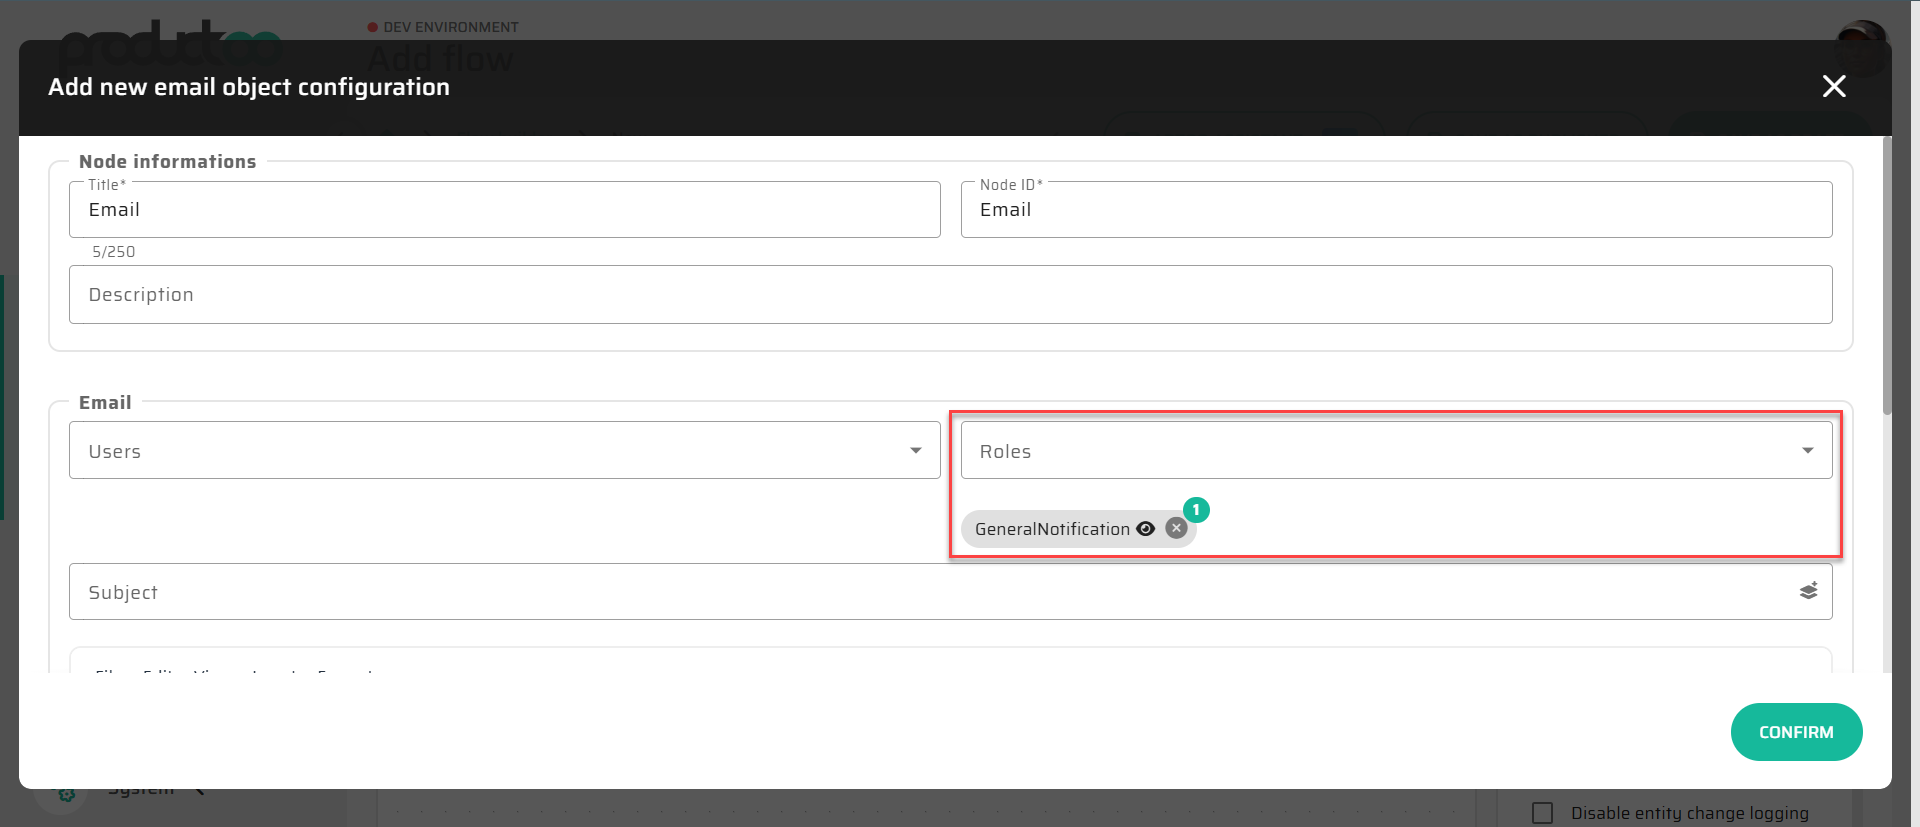
Link the Subject and Body fields to the inputs you created in Step 2 by using the variable icon.
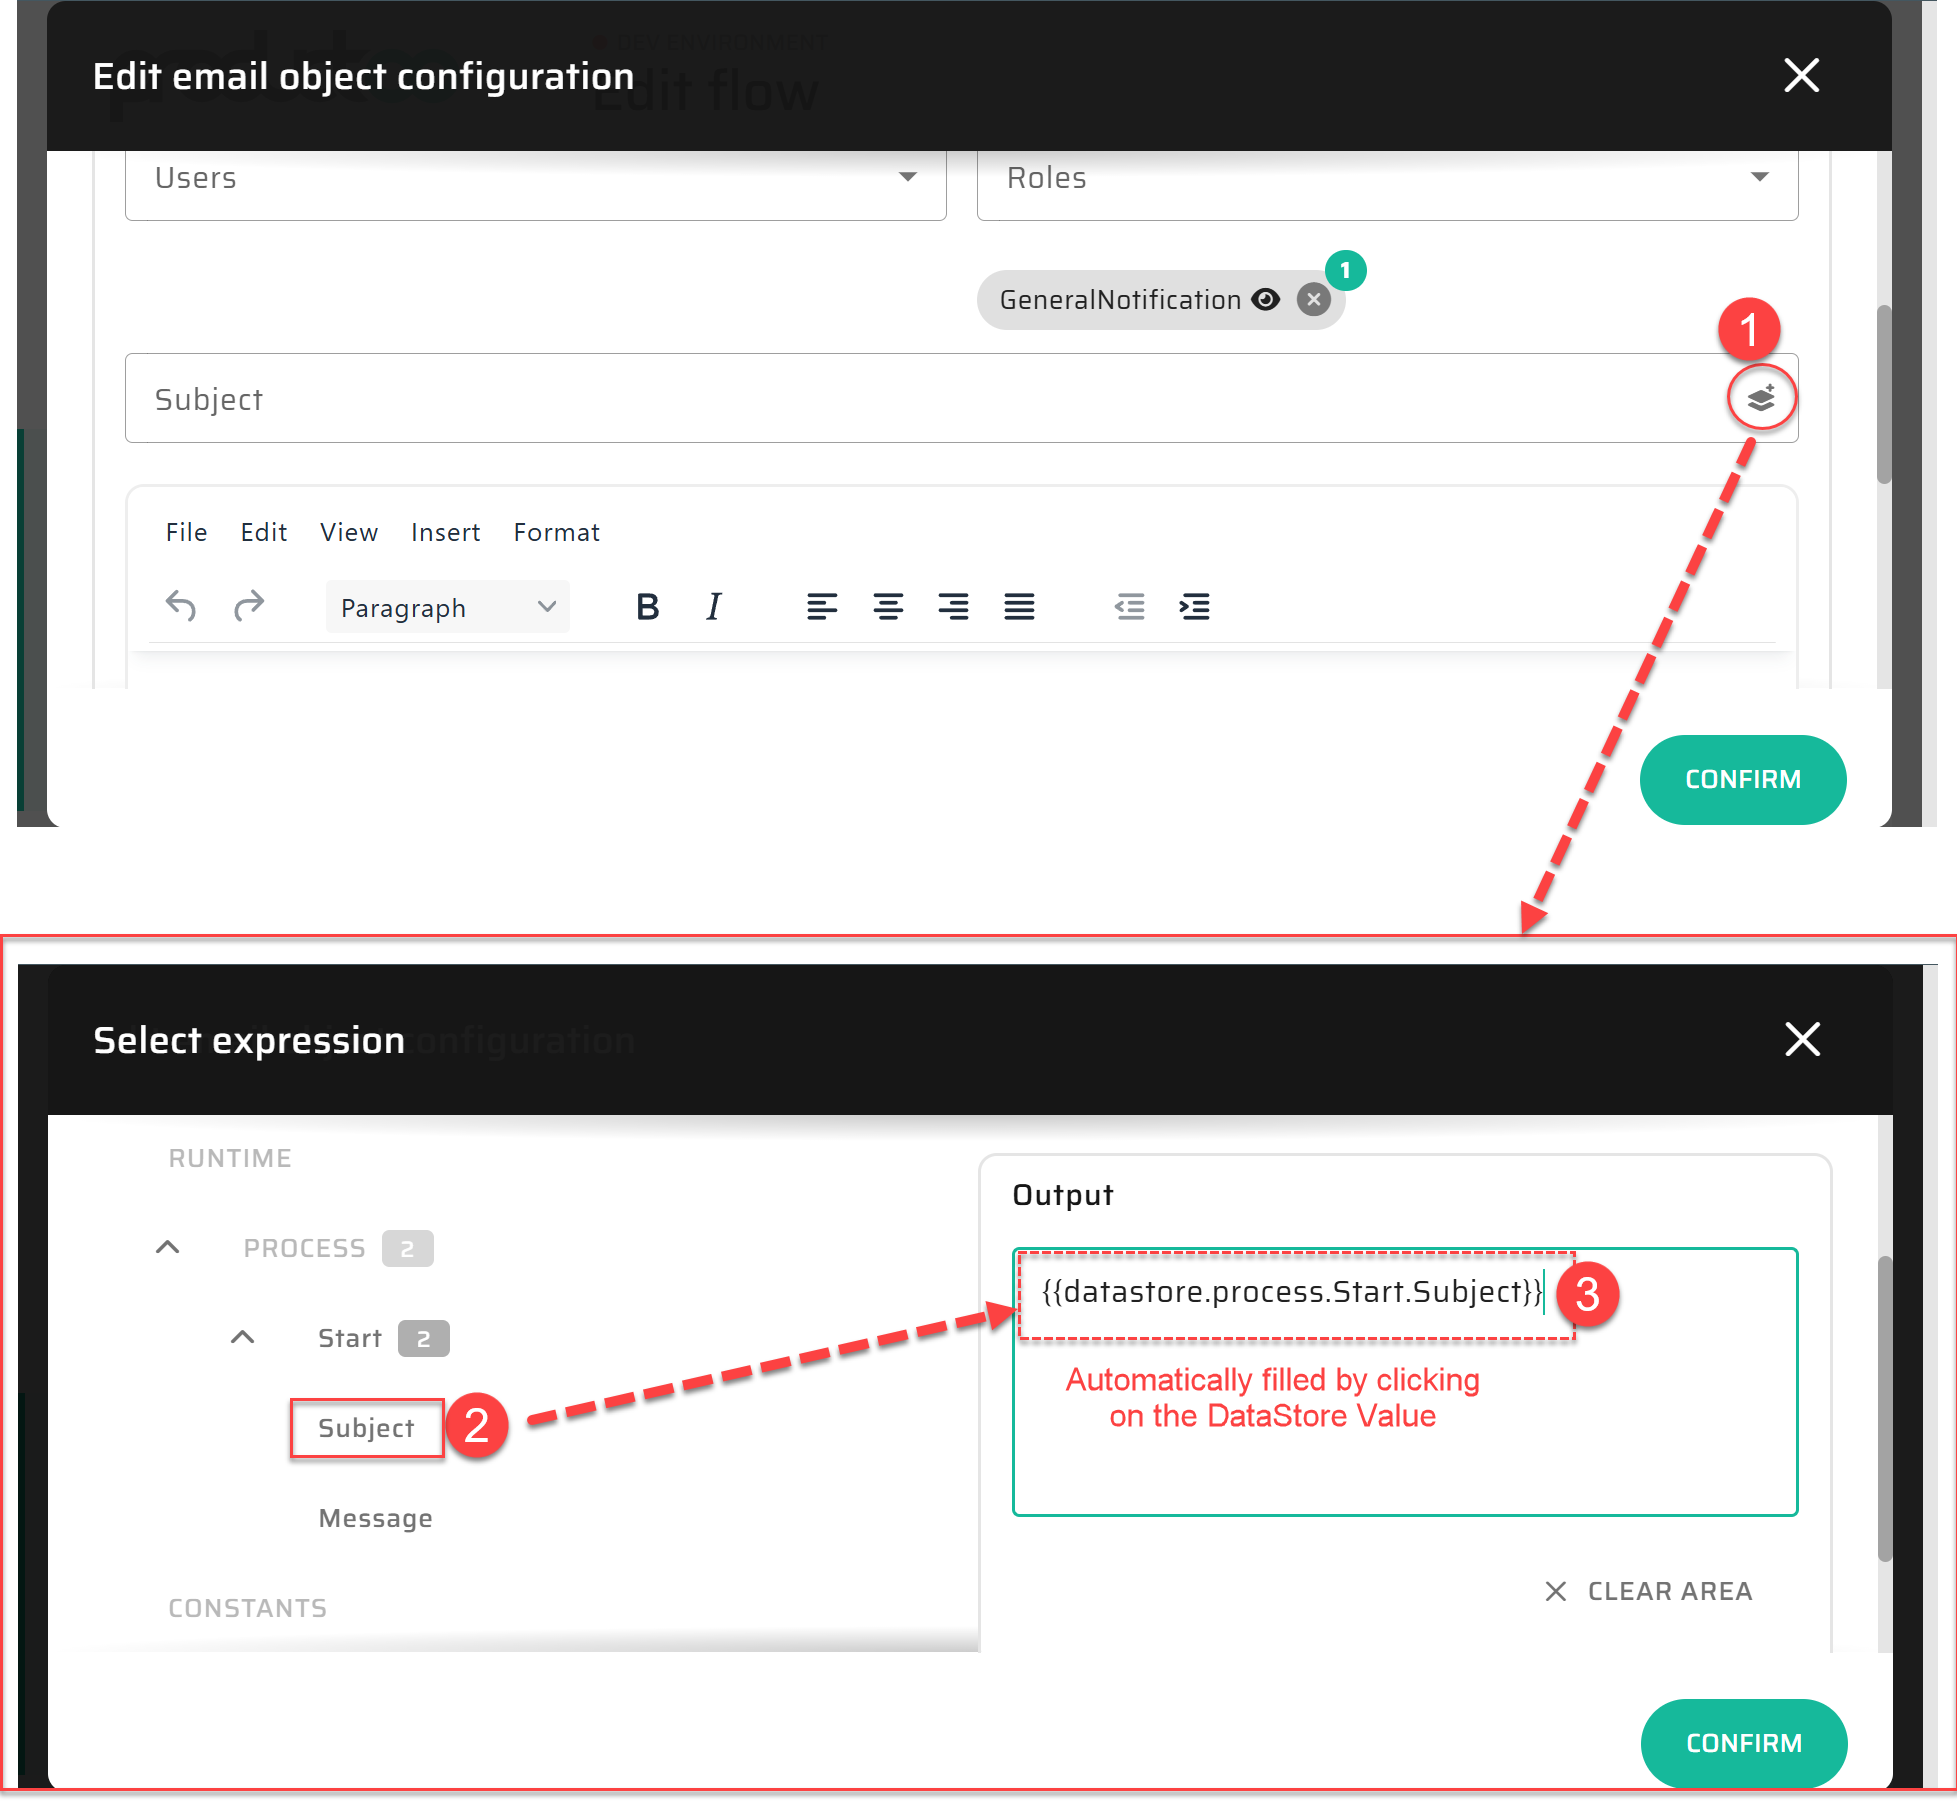
What is happening: You are telling the Email Node to use the specific text the user types in the UI.
Why it matters: This "no-code mapping" ensures that data flows correctly from one step to the next without requiring manual programming. It allows the system to be dynamic - the email will always contain exactly what was typed during that specific run
Step 4: Publish Your Work
Add an End Node and connect it to the Email Node to finish the path.
Click SAVE AS PUBLISHED. Your logic is now "live" and ready to be used by your interface.
Next Step:
Now that the "Brain" knows how to send the email, let's build the "Body" - the actual screen where people will type. Continue to Dimension 2 (Interactivity) - Designing Your User Experience.