Use Screen Splitter
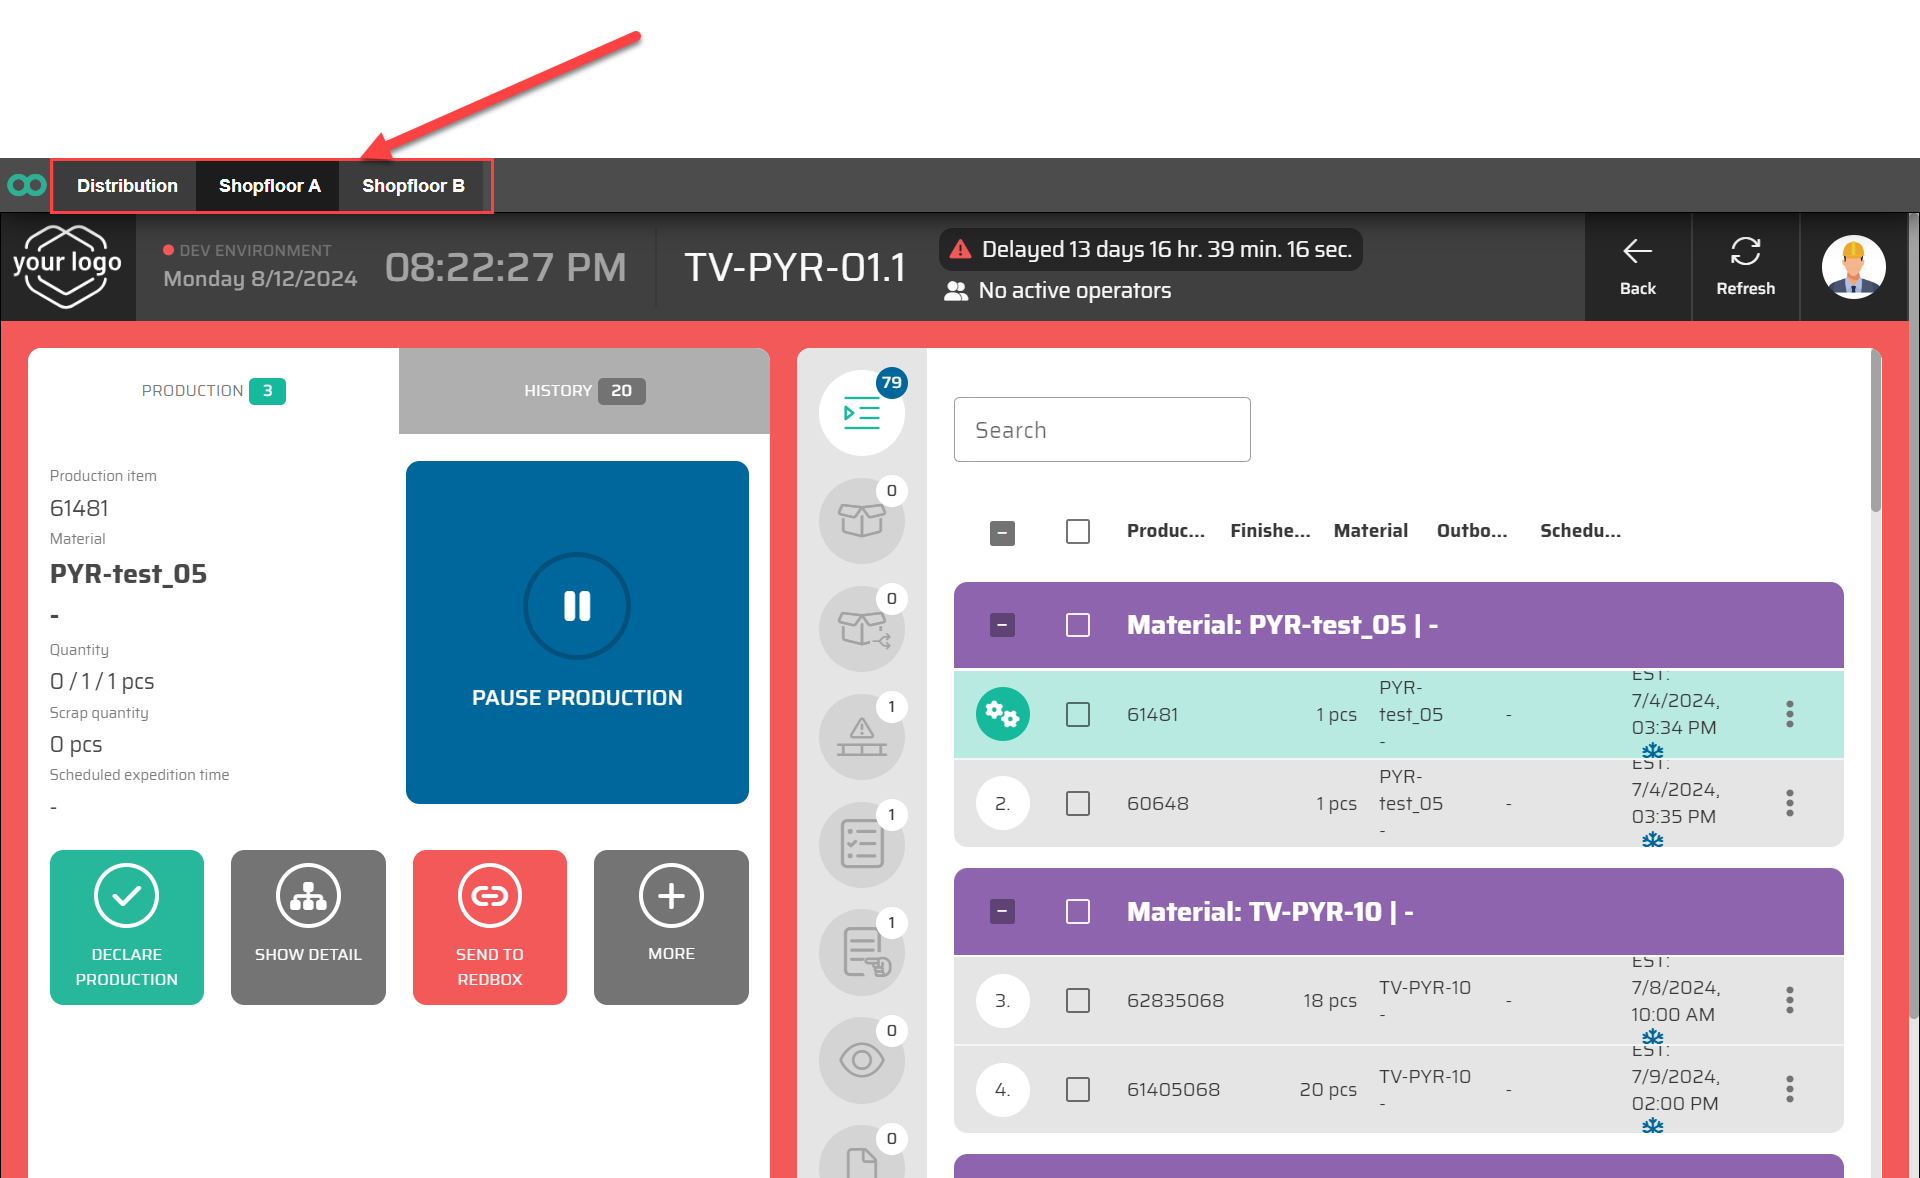
The "Screen Splitter" feature in the P4 application is a powerful tool designed to enhance the user experience when working with multiple web applications simultaneously within a single browser tab. This functionality is particularly beneficial in manufacturing environments where browser tabs and URL addresses are hidden due to fullscreen mode, making it difficult for operators to switch between different web applications. The Screen Splitter solves this problem by allowing multiple web windows to be displayed and managed within a single browser tab, with easy switching between different sets of applications.

Key Benefits
Maximized Screen Real Estate: Allows multiple web applications to be displayed side-by-side, making full use of the available screen space.
Seamless Application Switching: Operators can switch between different sets of web applications without leaving the fullscreen mode or navigating between browser tabs.
Customizable Layouts: Users can define fixed or dynamic layouts for sub-windows, optimizing the display according to the specific needs of the workspace.
Single URL Access: All configured web applications can be accessed via a single URL, simplifying access and reducing the need for multiple bookmarks or browser management.
How to Use Screen Splitter
Step 1: Define Screen Splitter Applications
Before setting up the Screen Splitter, you'll need to create entries for each web application you wish to display.
Navigate to "Screen Splitter Applications": In the P4 application, go to the Parametrization - Other -and select "Screen Splitter Applications."
Create a New Entry:
Name: Enter a unique name for the application.
Description: Optionally, add a description for clarity.
URL: Input the web address (URL) of the application.
Save: After entering the details, save the application.

Step 2: Create a Screen Splitter
Once the applications are defined, you can create the Screen Splitter that will manage the display and layout of these applications.
Navigate to Screen Splitter Setup: In the P4 application, go to the “Other” - "Screen Splitter" section.
Create a New Screen Splitter:
Name: Provide a name for the Screen Splitter.
Orientation: Choose the orientation of the Screen Splitter (Landscape or Portrait).
Control Panel Position: Define where the control panel for switching between tabs will be located (e.g., top-left, bottom-right, etc.).

Define Tabs:
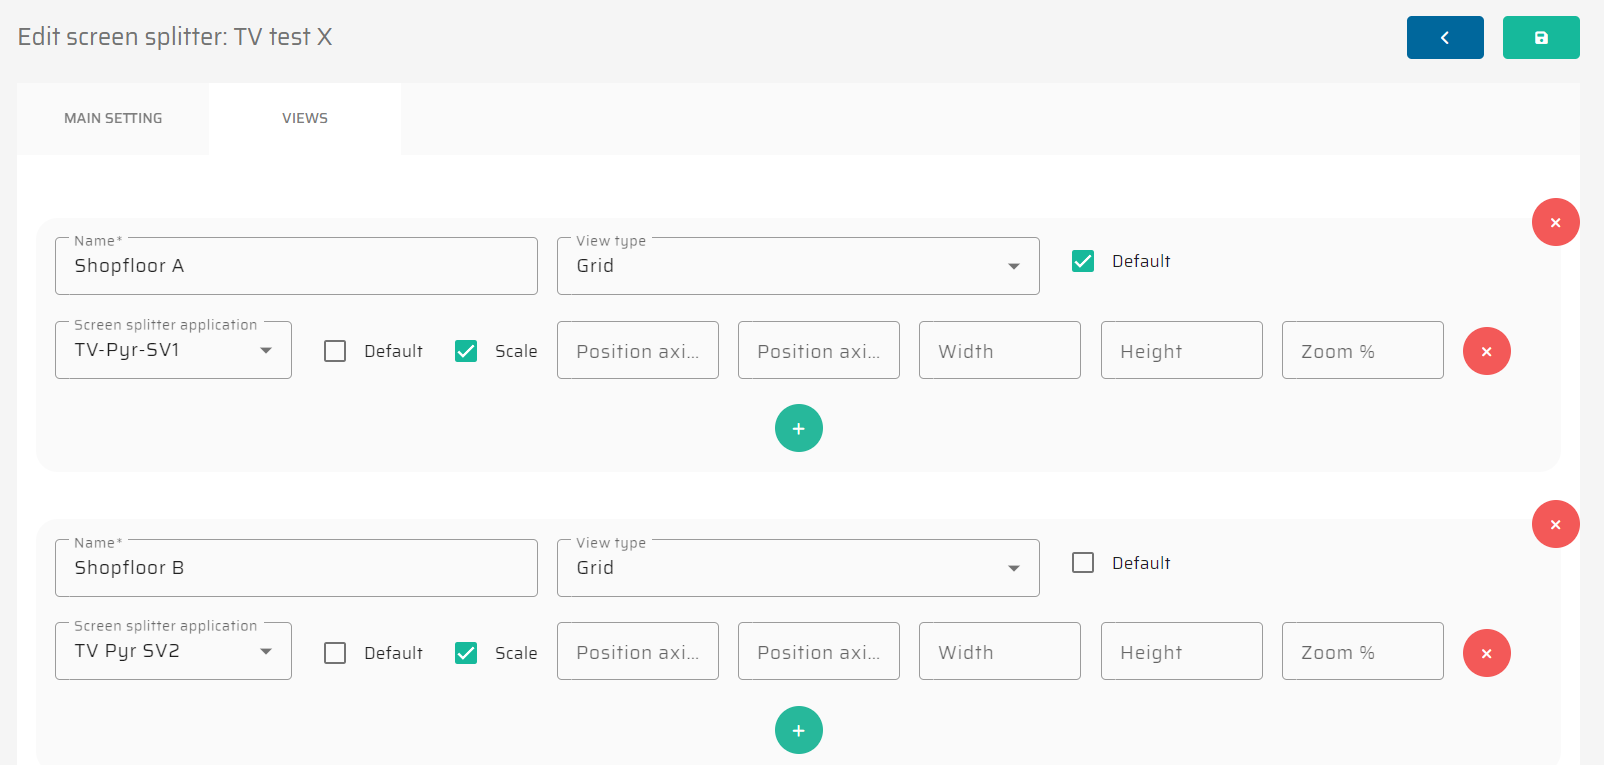
Add a New Tab: For each group of applications you want to display together, create a new tab.
Tab Name: Assign a name to each tab.
Layout Settings: Choose whether the sub-windows in this tab will have a fixed size and position or if they should adapt dynamically within a grid layout.
Assign Applications to Tabs:
Select Applications: For each tab, select the previously defined applications that should appear within it.
Window Configuration: For each application within a tab, configure its window size, position, and zoom level if necessary.
Default Tab: Choose which tab should be the default view when the Screen Splitter is first opened.

Save the Screen Splitter: After configuring the tabs and applications, save your Screen Splitter.
Step 3: Deploy and Use the Screen Splitter
Once your Screen Splitter is set up, you can deploy it to the intended environment.
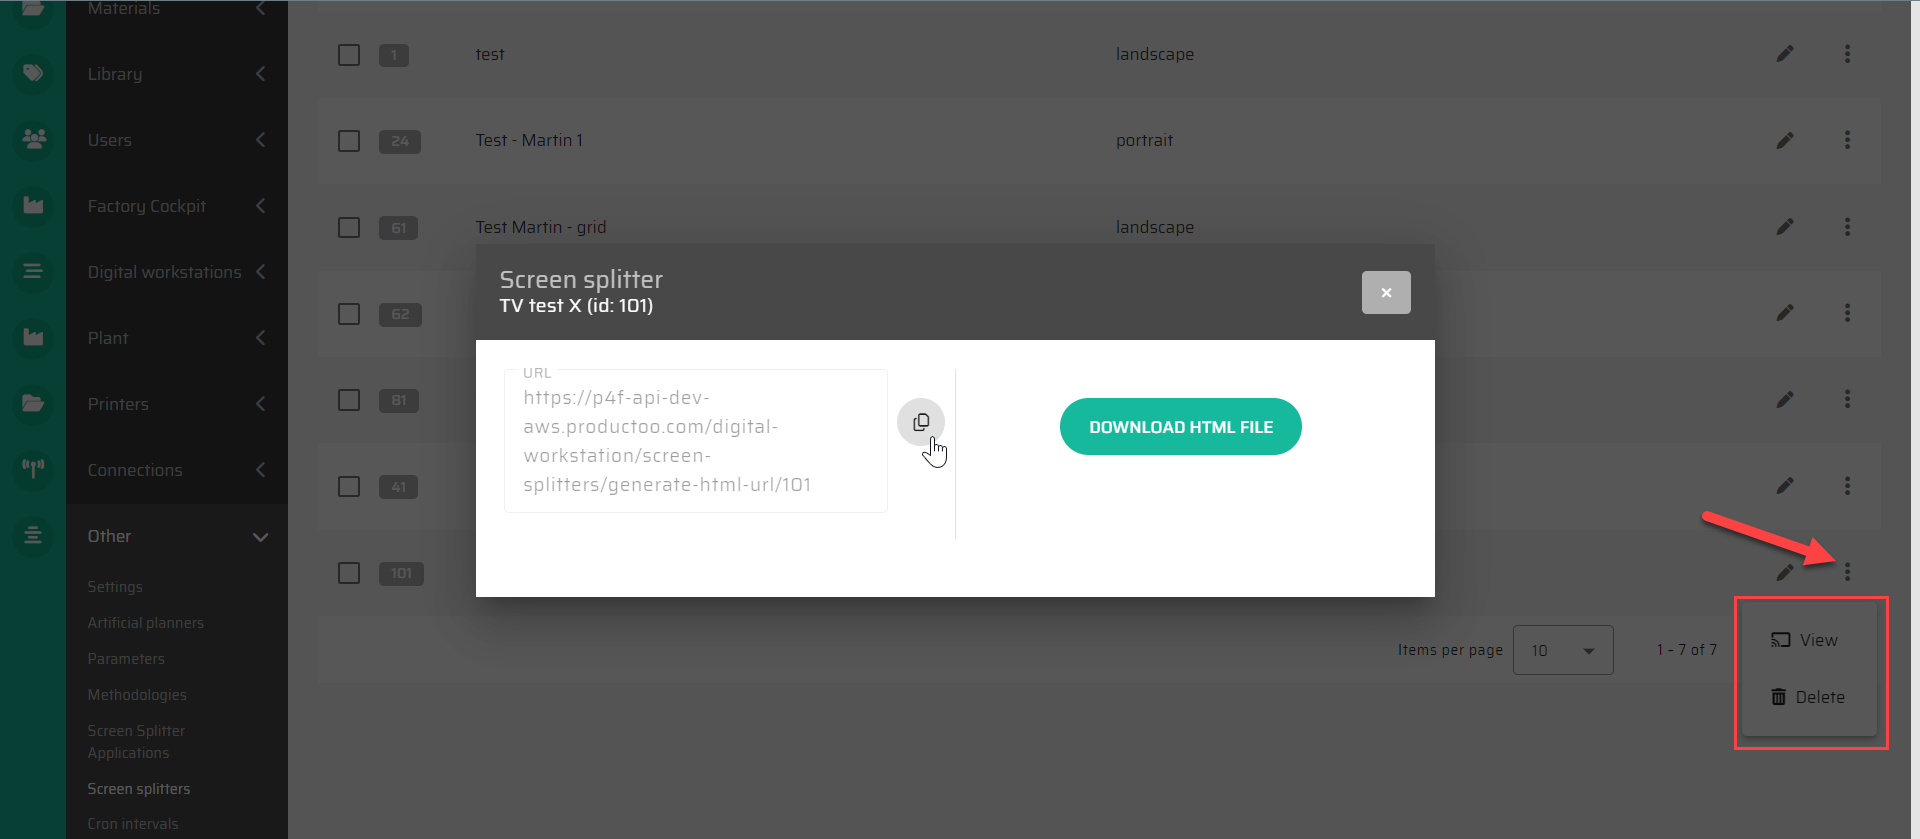
Access the Screen Splitter URL: Copy the generated URL from the list of existing Screen Splitters. This URL can be used to access the configured Screen Splitter directly.
Download HTML File: Optionally, you can download an HTML file of the Screen Splitter, which can be transferred to a specific computer for use, such as in a manufacturing plant where network access might be limited.
Open in Browser: Open the Screen Splitter in a web browser on the target machine. The control panel will allow you to switch between different tabs and manage multiple applications efficiently.

Tips and Best Practices
Organize Applications Logically: Group related applications into the same tab to make the operator’s workflow more intuitive.
Utilize Dynamic Layouts: If screen space is at a premium, consider using the dynamic grid layout to make the most of available space.
Test Before Deploying: Test the Screen Splitter configuration on a similar environment to ensure that all applications display correctly and that the layout meets operational needs.
Troubleshooting
Applications Not Displaying Correctly: Check the URL and settings in the "Screen Splitter Applications" section. Ensure the web application is accessible and that there are no restrictions.
Control Panel Not Visible: Ensure the control panel position is correctly set, and try repositioning it if it’s outside the visible area of the screen.
Slow Performance: If the Screen Splitter is slow to load or switch between tabs, consider reducing the number of applications displayed simultaneously or optimizing the network connection.
By following this guide, you’ll be able to fully utilize the Screen Splitter feature in the P4 application, optimizing workflows and enhancing productivity in manufacturing environments.
